Multiscreen Video with PiWall
Summary
This tutorial will walk you through the setup of a video wall installation. It features just three screens but it can easily be scaled to as many screens as you wish.
These instructions use the PiWall software and can be used as an alternative to their configuration and installation instructions, which were a bit confusing to me.
Each screen requires its own RPi, and the system also requires an additional “Master” Pi as well as additional hardware listed below.
OSX / Windows
I am using a Mac in this tutorial. This will aboslutely still work with windows, but some of the Terminal commands may be different. You are probably smart enough to Google the ones that don’t work for you. Probably.
Note on PiWall
There are many different ways to set up a PiWall. This is just one of them. You may disagree with how I’ve dont it but, hey it’s my blog. So there. I’m just passing on what worked for me. I hope it helps someone somewhere someday somehow.
Materials
- Raspberry Pi’s (1 per screen + 1 master)
- For each Pi:
- SD card
- Power supply
- Ethernet cable
- Screens + power supplies
- HDMI cables (one for each screen)
- Ethernet switch (example)
- Wireless router (example)
- Power strip or equivalent power source
Why the wireless router? Well in our case we are going to have 4 Pi’s and they’re all going to be connected using ethernet cables. If we add USB wifi antennas to that, it can confuse the OS as to which one it should assign an IP address. The best possible scenario is to have a single WiFi access point that allows me to communicate to all the Pi’s easily. The wireless router allows me to do that. I realize this is an added expense, but I found it to be well worth it and I’ve begun using the device on the other projects too.
As an alternative, you could put a USB WiFi dongle in each Pi, and set the network configuration for each to join your wireless network. For info on how to do that, go here. I will not be discussing that kind of setup within this tutorial, however. Sorry. Kinda. Not really.
Raspberry Pi Setup
PiWall works as a master/slave system. one Pi, the master, will have the video file and send it out to all the slaves. each slave is a Pi with a screen attached to it. The master has no screen.
Unless otherwise noted, you will want to follow these instructions for EVERY PI IN YOUR SYSTEM.
To do the setup, you will need to access the Pi’s command line. The easiest way to do this is to hook it into a monitor and keyboard. If you’re super savvy, you can run it headless (Google it). If you use Pi’s a lot, you may want to invest in a LapDock. I use mine all the time.
If you’ve never set up a Raspberry Pi before, go here to learn how to install the OS and come back!
OS Setup
Make sure you have Raspian installed on the SD card before booting your Pi. It is recommended that you work with a fresh install to avoid conflicts with packages you already installed and configuration files you may have already changed. Wheezy and Jessie have been tested with this setup and both work.
If you are on Wheezy, you wills ee a command line and need to login (username = pi, pswd = raspberry). If you’re on Jessie, it should boot to the desktop interface. From there, open the Terminal program. on Wheezy, you’re already on the command line so you’re good to go.
If you want to check your keyboard layout (default is UK), run sudo raspi-config and use the arrow keys and Enter to go into “Internationalisation Options.” If you installed your OS using N00Bs, you have the option of setting the keyboard layout via a dropdown menu at the bottom of the install screen. Finish out of the config scvreen when you’re down using the right-arrow key and Enter.
Now it’s time to setup your network configuration.
Network Setup
In the command line, run
sudo nano /etc/network/interfaces
Somewhere in that file you will see a linke that reads iface eth0 inet manual
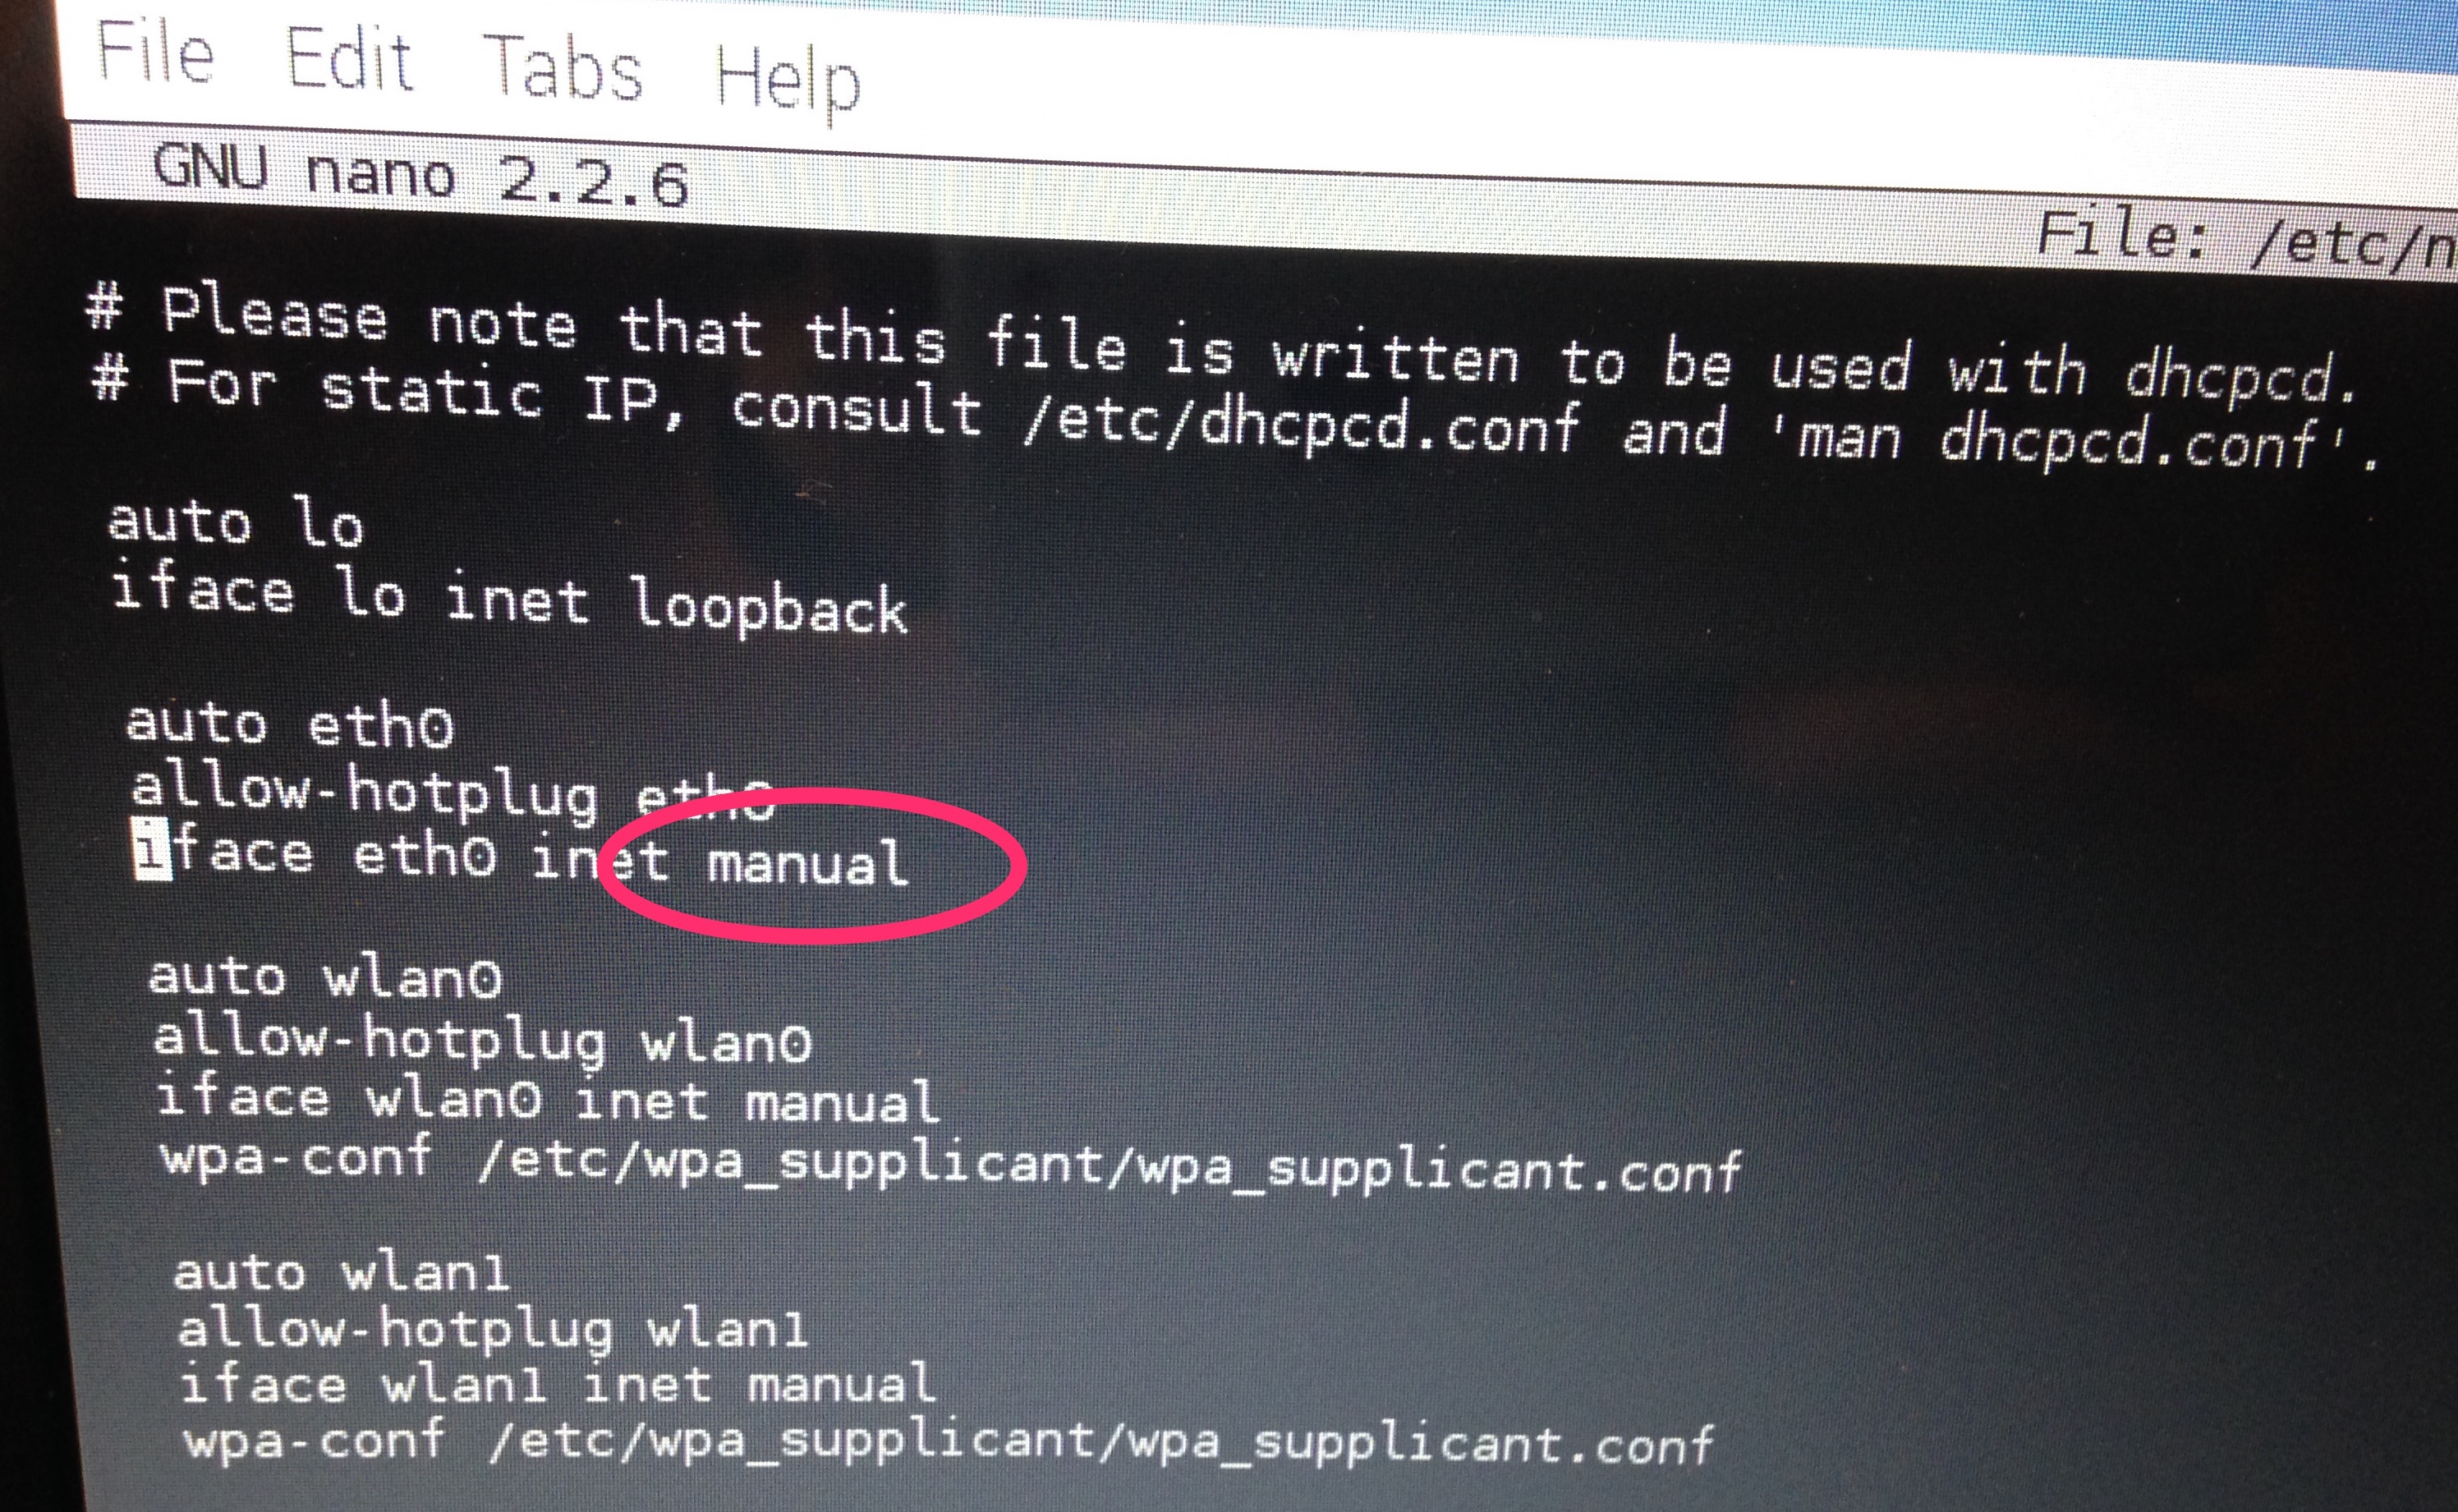
Change that line to read: iface eth0 inet static
Then add the following lines below that:
address 192.168.XXX
netmask 255.255.255.0
up route add -net 224.0.0.0 netmask 240.0.0.0 eth0
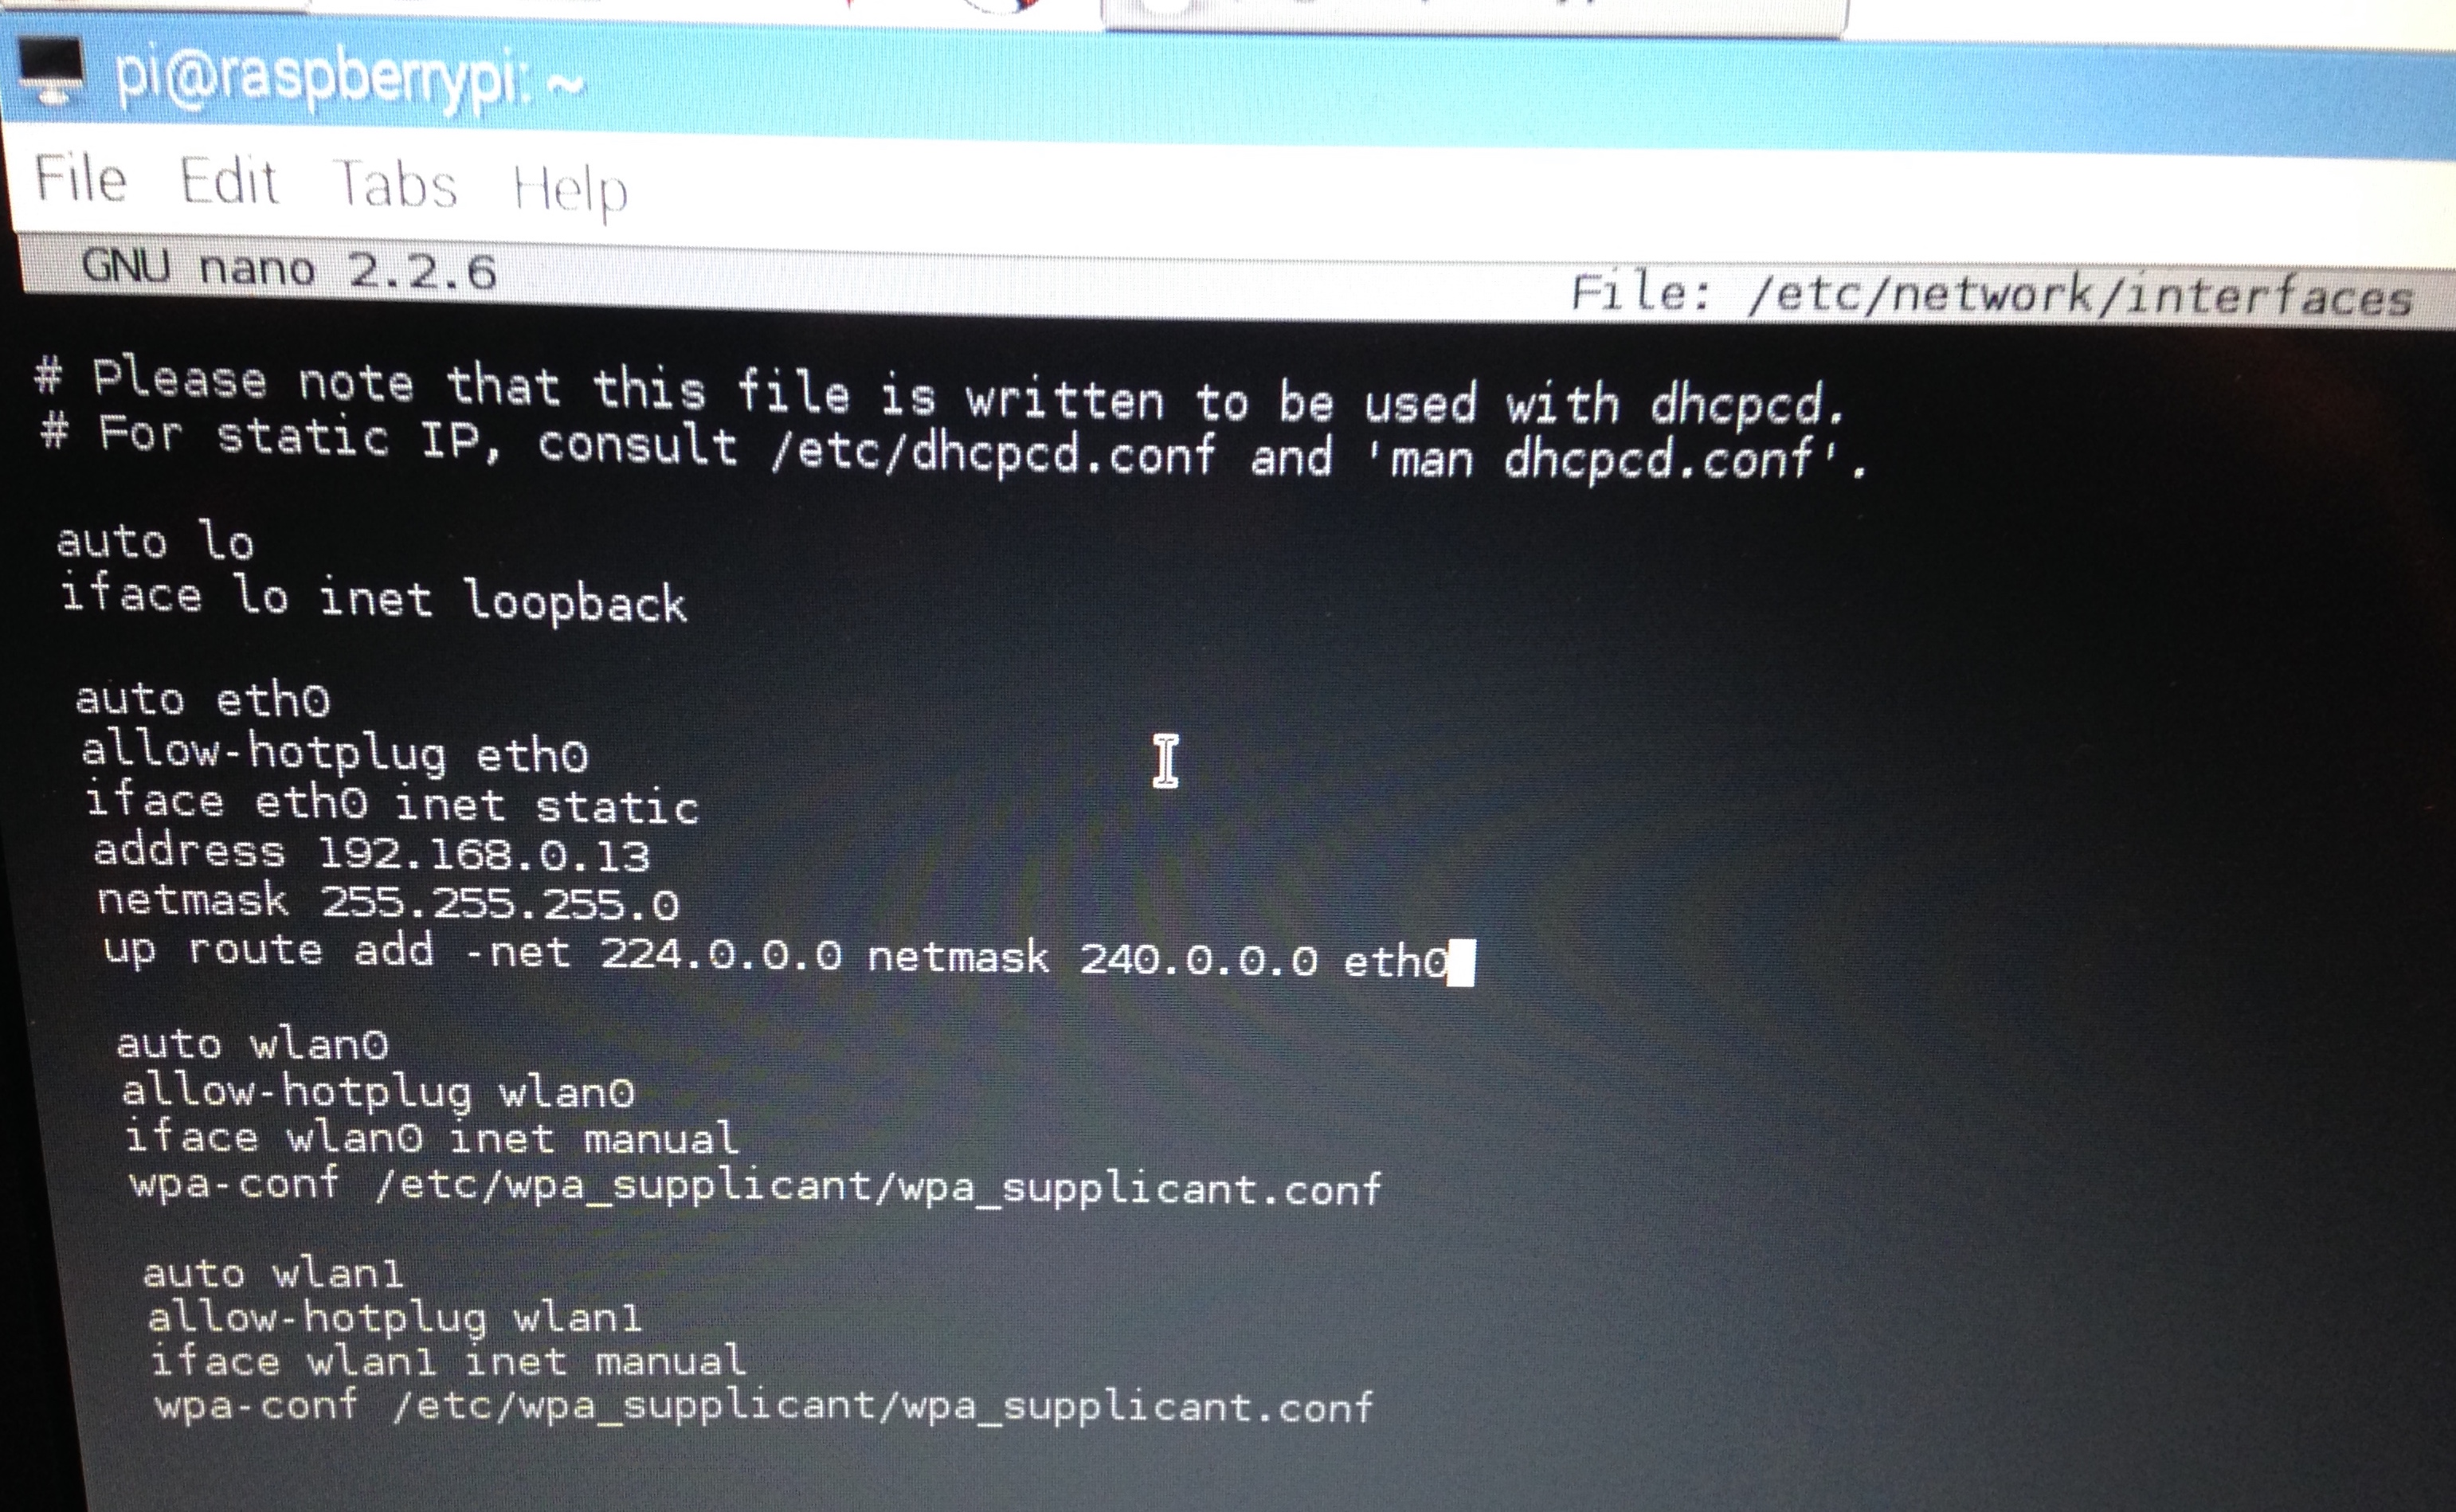
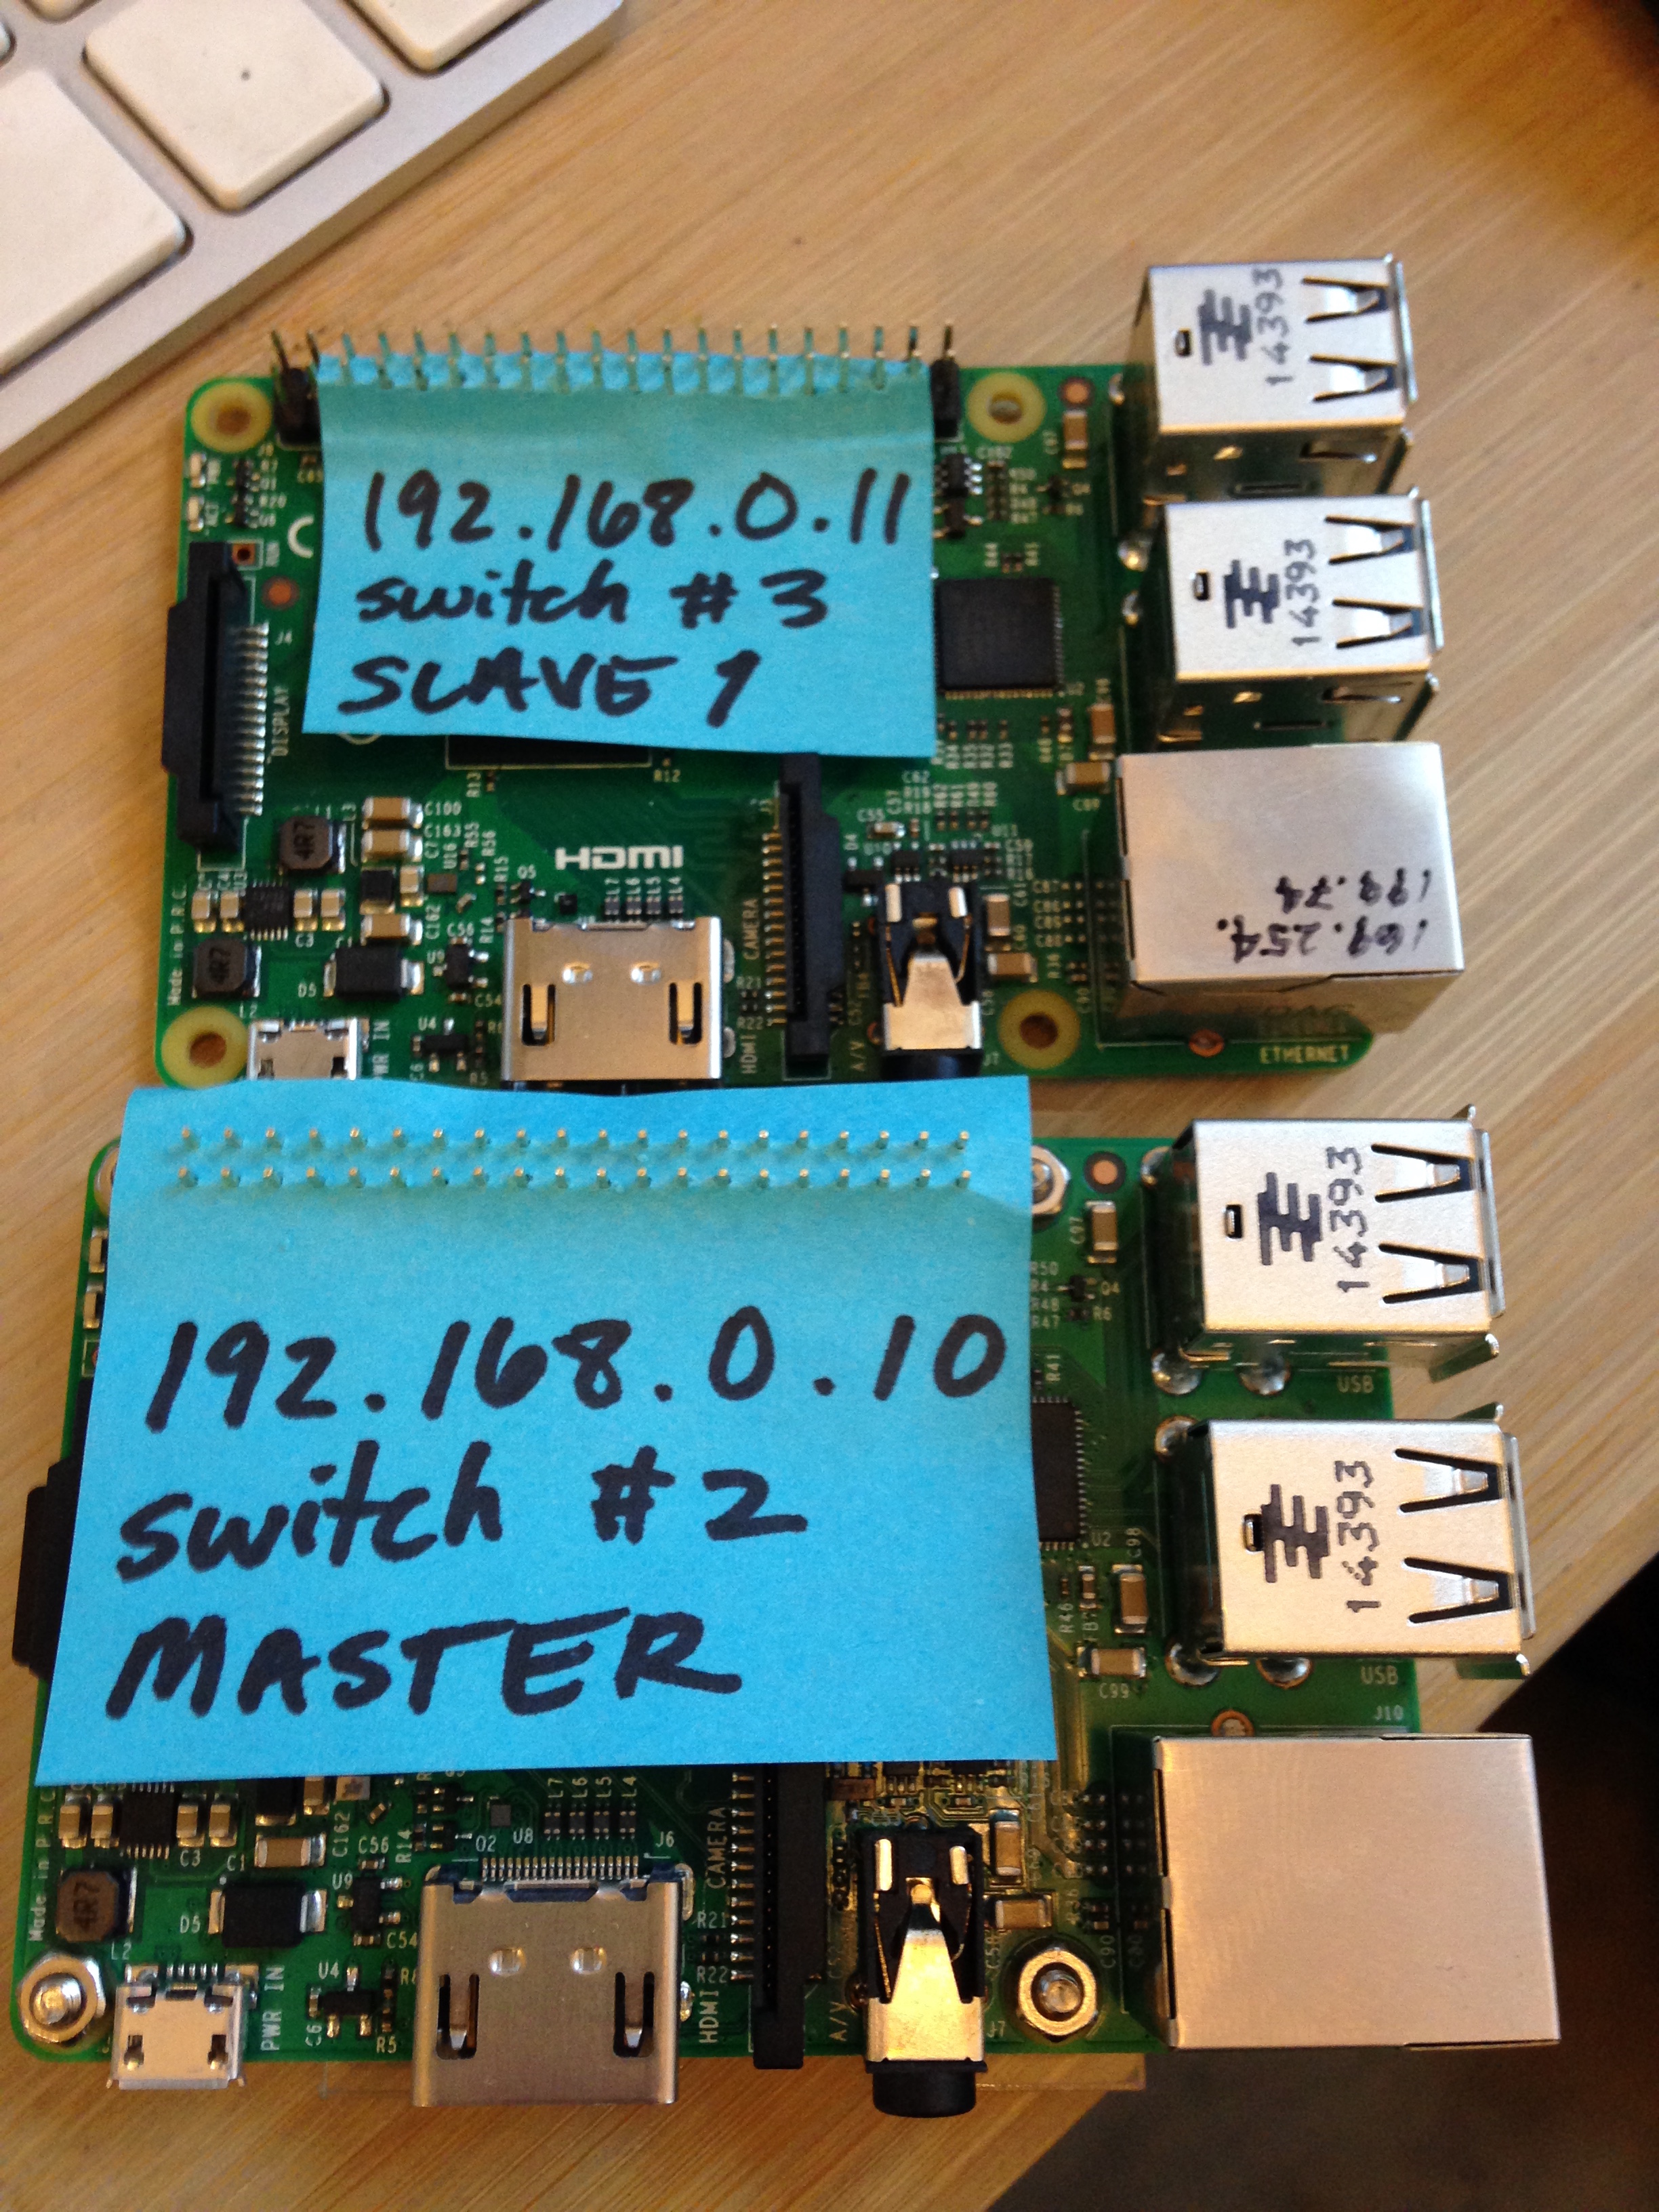
What’s with the XXX? You’ll want to substitute XXX with a number you can remember. Each Pi will need a number (IP Address) to identify it on the network we are building. As an example, 192.168.0.10 for the first Pi (master), 192.168.0.11 for the second, and so on. The numbers should be sequential. You can use 2 digits or 3 (100, 101, etc).
My setup looks like this: Master Pi - 192.168.0.10 Slave Pi #1 - 192.168.0.11 Slave Pi #2 - 192.168.0.12 Slave Pi #3 - 192.168.0.13
NOTE: If you are not using the WiFi router as recommended here, you will need to check your network for existing IP addresses and make sure you don’t assign an IP address to a Pi that is already in use by another device. Google “scan IP leases nmap” to figure out how to do that. It will require you to install a command line tool called ‘nmap.’
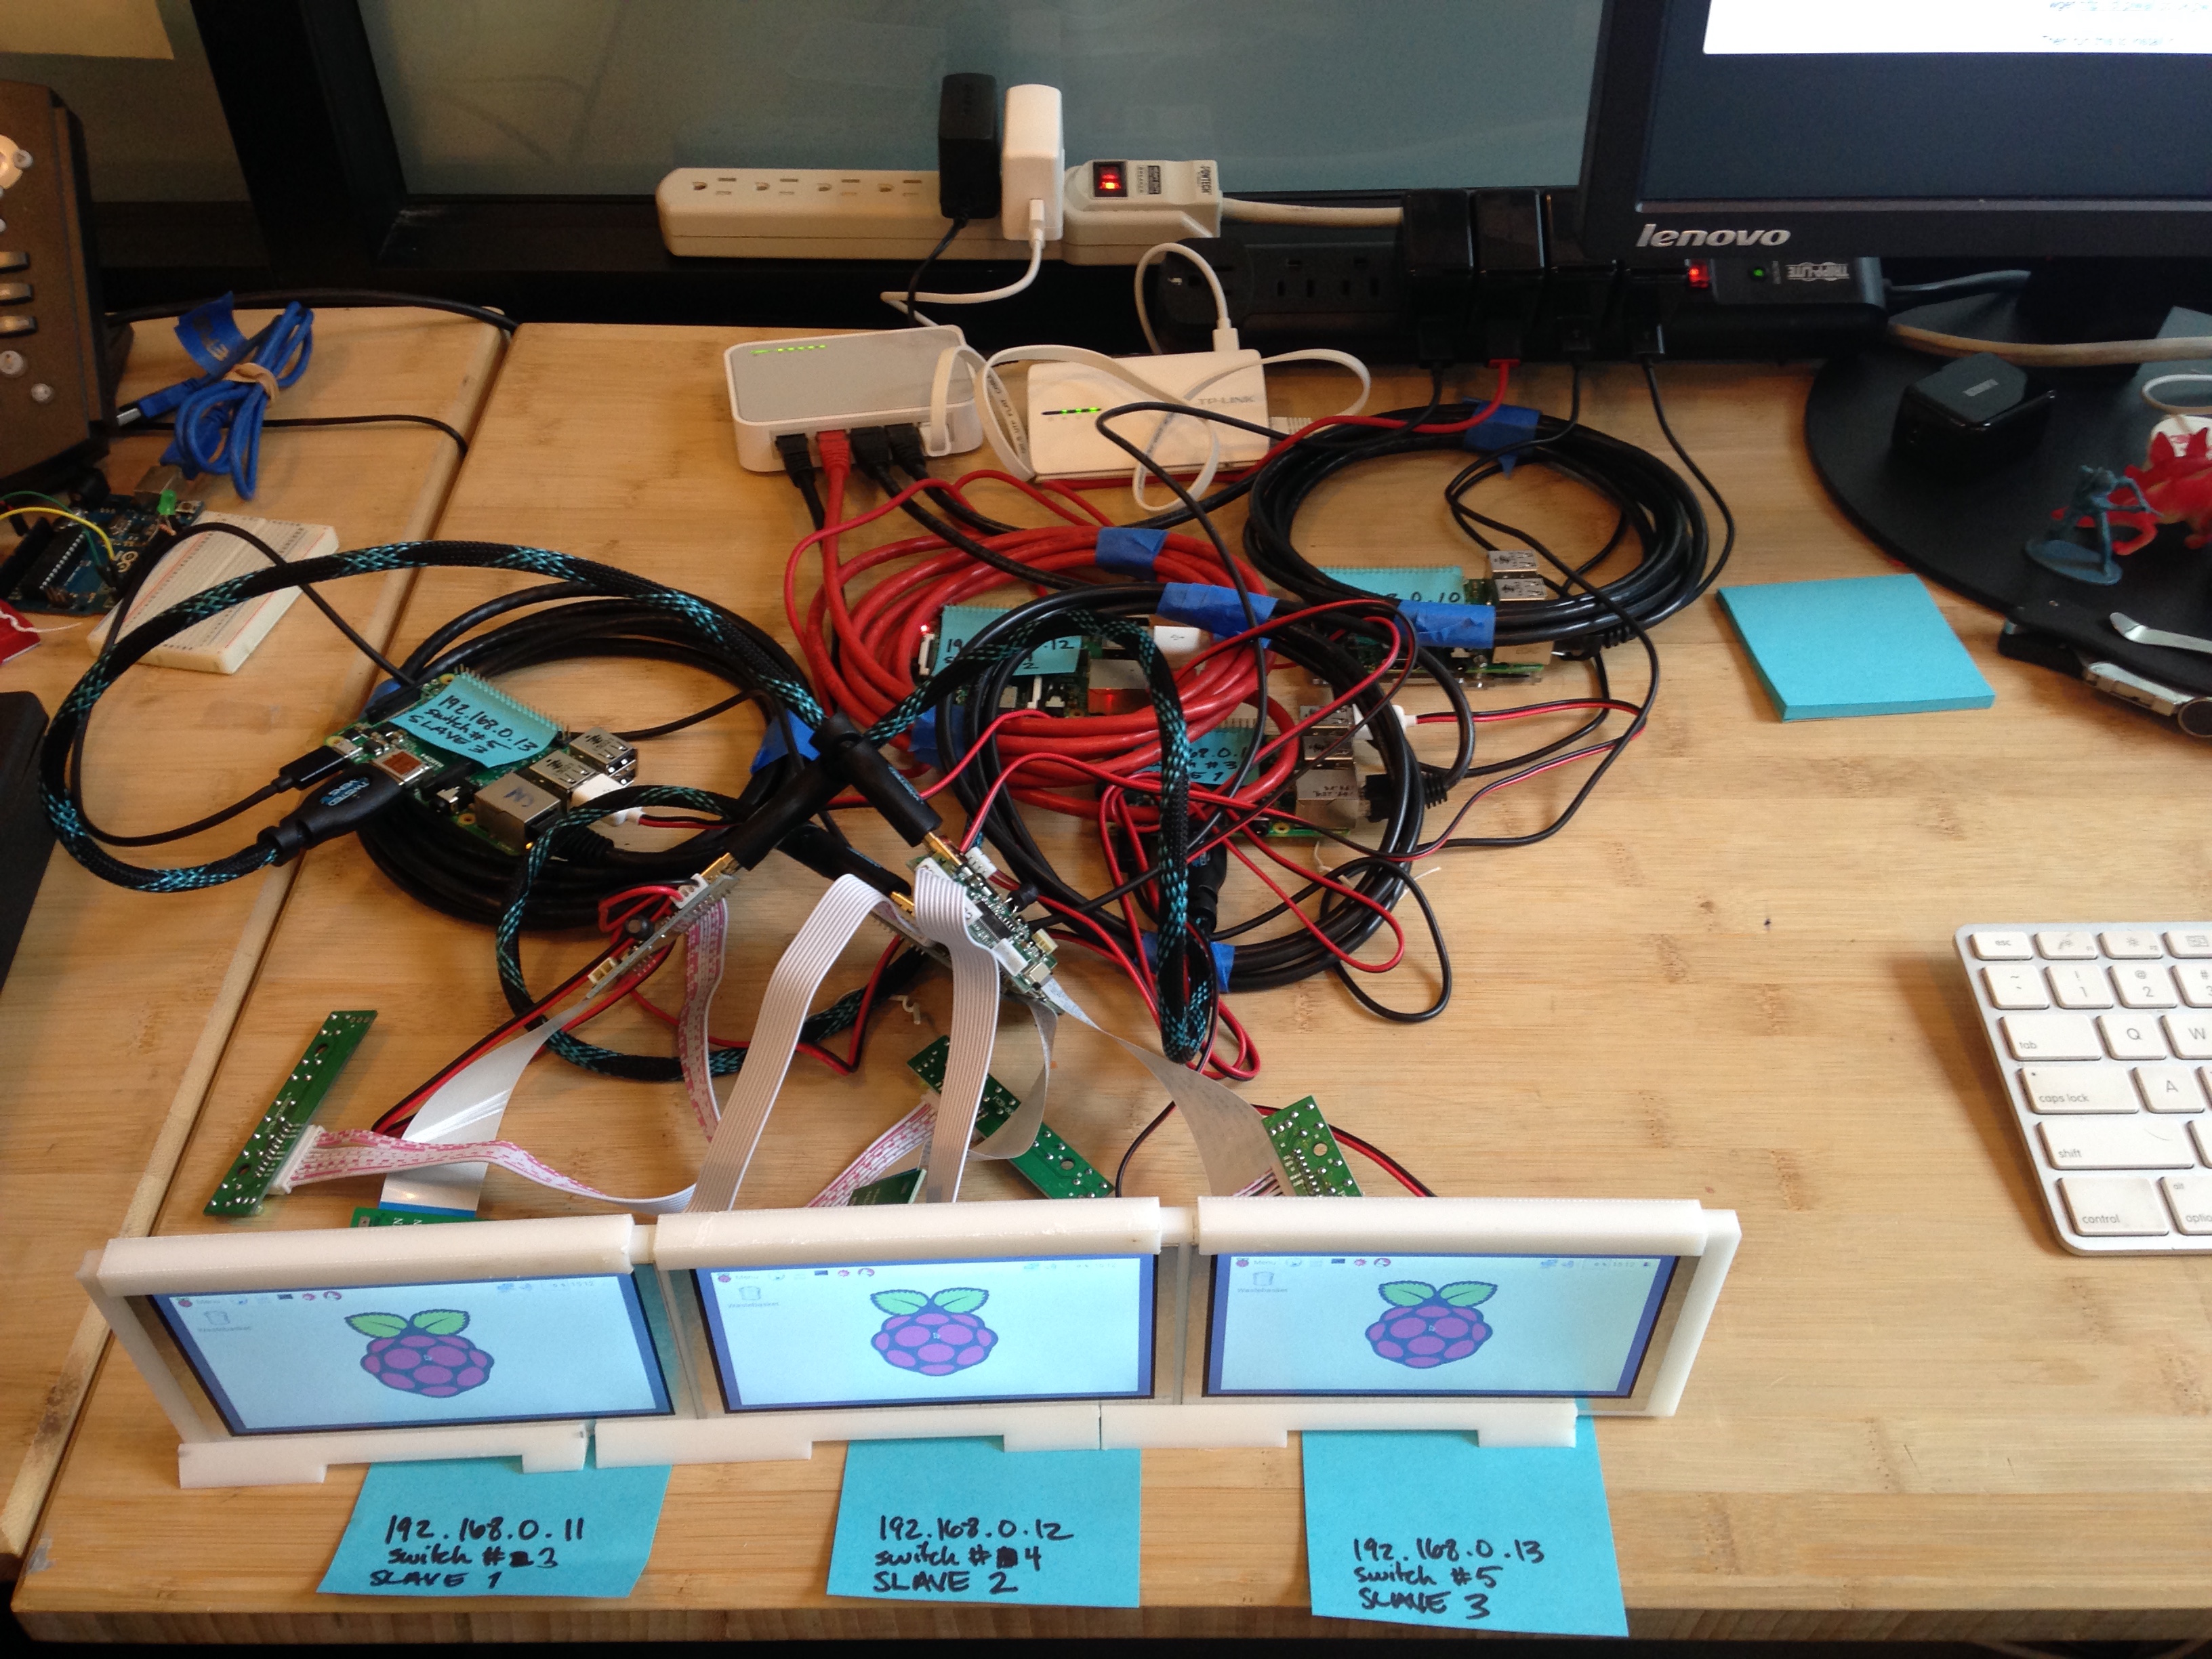
At this point I usually use a sticky note to keep track of the info for each device. You can ignore the “switch” info in the pic below. That’s coming later.
Save and quit by entering ctrl + o then Enter to agree to save the file to its original name/location. Then ctrl + x to exit.
Optional Setup
My screens require 5V, 2A of power, and I can provide that thorugh the USB ports on the RPi2 but I have to configure that setup manually. If you have a similar need, follow these steps. If not, skip to the next section.
For each Pi that will have a screen (each slave), open the boot config file by running:
sudo nano /boot/config.txt
Follow the instructions[here][adafruit-power] for editing that file. Save (ctrl + o) and exit (Enter then ctrl + x). Be sure to add the very last line max_usb_current=1
Reboot the slaves! Run sudo reboot.
Finish up
Okay, that’s it for the Pi’s for now. If you haven’t already, shutdown all the Pi’s:
sudo shutdown -h now
WiFi Router Setup
### Device Info
These instructions are for the router recommended in the Materials list.
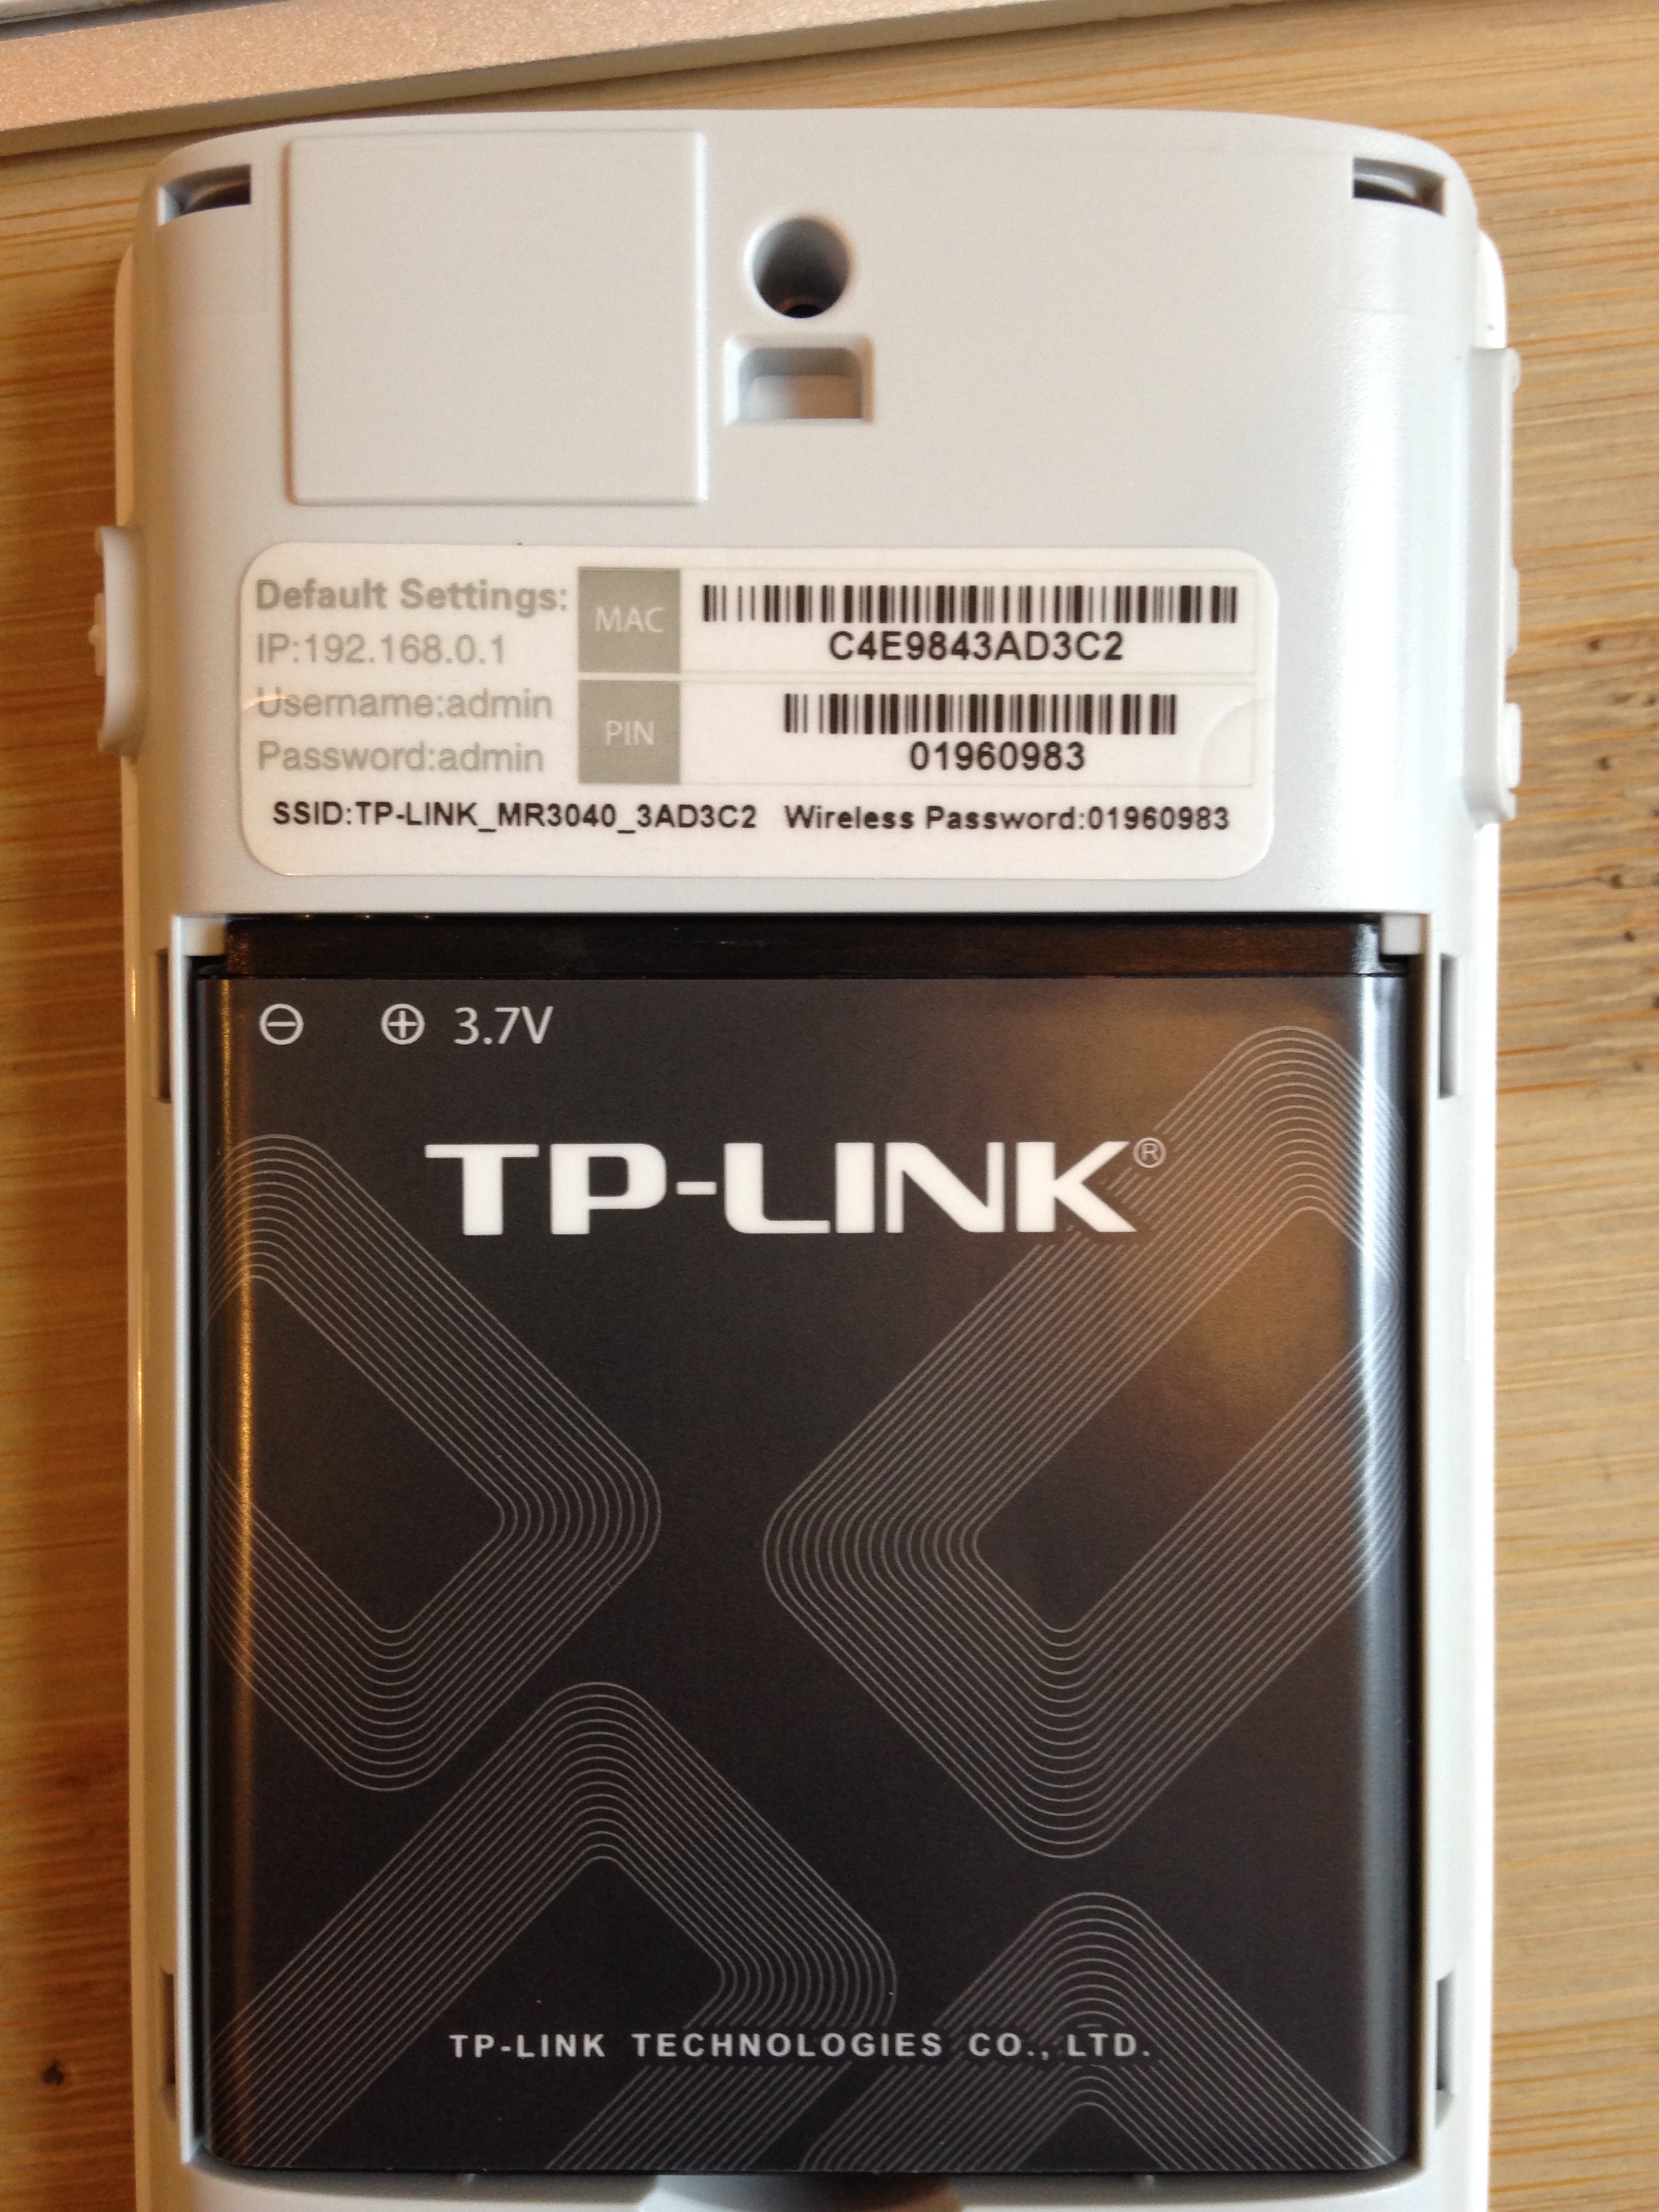
Your router comes with instructions on how to open the device and install the battery. Go ahead and open up the device and put in the battery. Before you replace the cover, write down (or take a pic) the info on the label inside, just above where the battery goes.
Set the switch on the side to WISP, plug in the device, and power up. This will put the router in a mode that effectively extends your existing wireless network.
###Connecting and Configuration
On your computer, look for the matching WiFi network. It should match the WiFi info from the previous step and look something like this: “TP-LINK_MR3040…” Connect to it and when asked for a password, enter the PIN from the previous step.
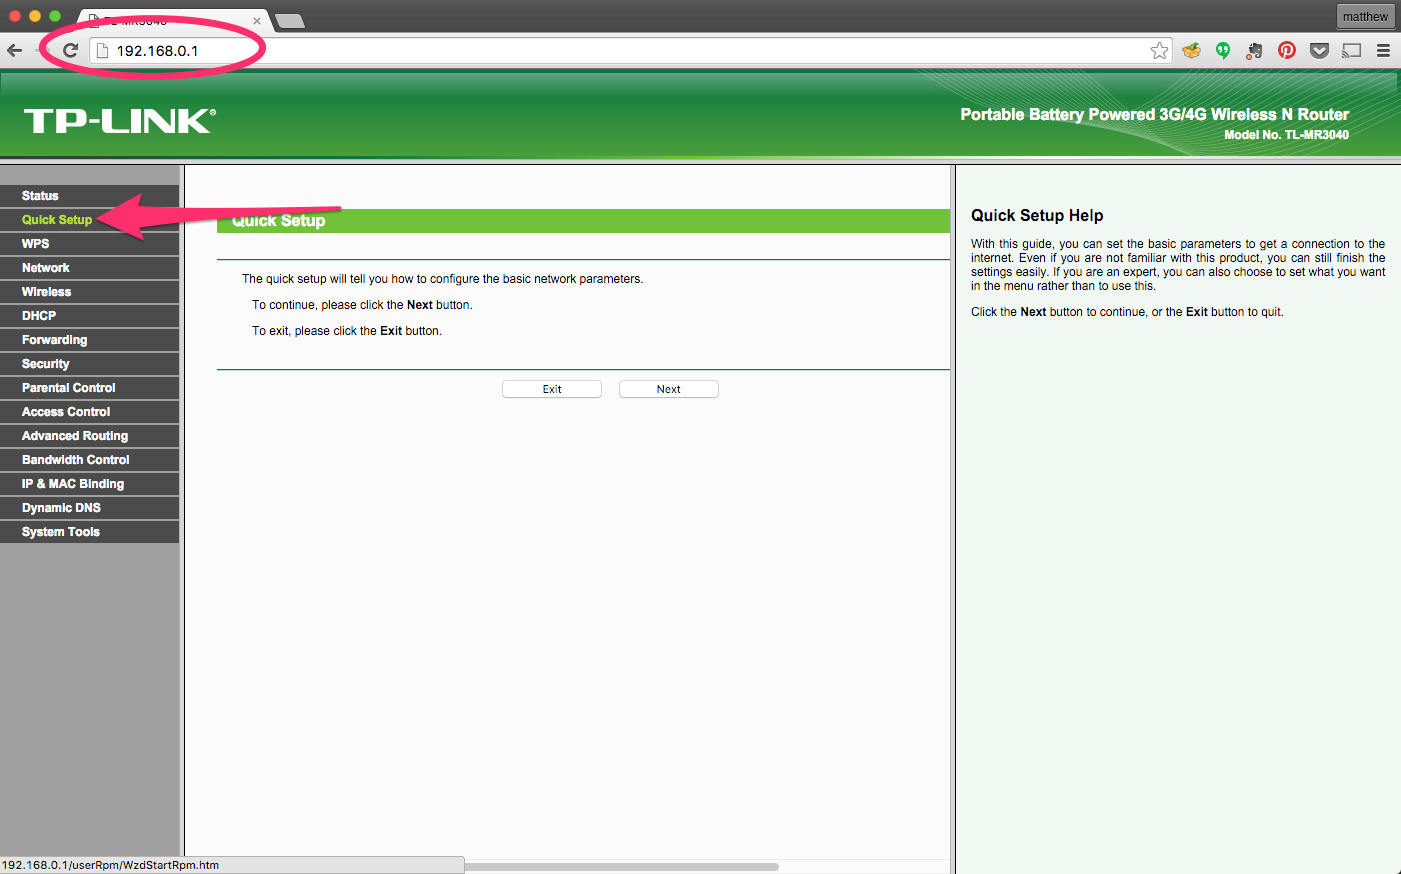
Once connected, open your browser and go to 192.168.0.1. On the left-side menu, click “Quick Setup.” Click through the menus without changing and of the defaults unless you know what you’re doing (I didn’t so I kept them where they are).
When you get to the screen that asks for information about your wireless network, click the “Survey” button to see a list of networks to choose from. Connect to yours by clicking the “Connect” link next to your network’s name and then enter your password (most likely a WPA/WPA2 password).
Reboot the router when it prompts you and you should be back on the regular internet - only now yhou’re going through the wireless router.
Physical Connections
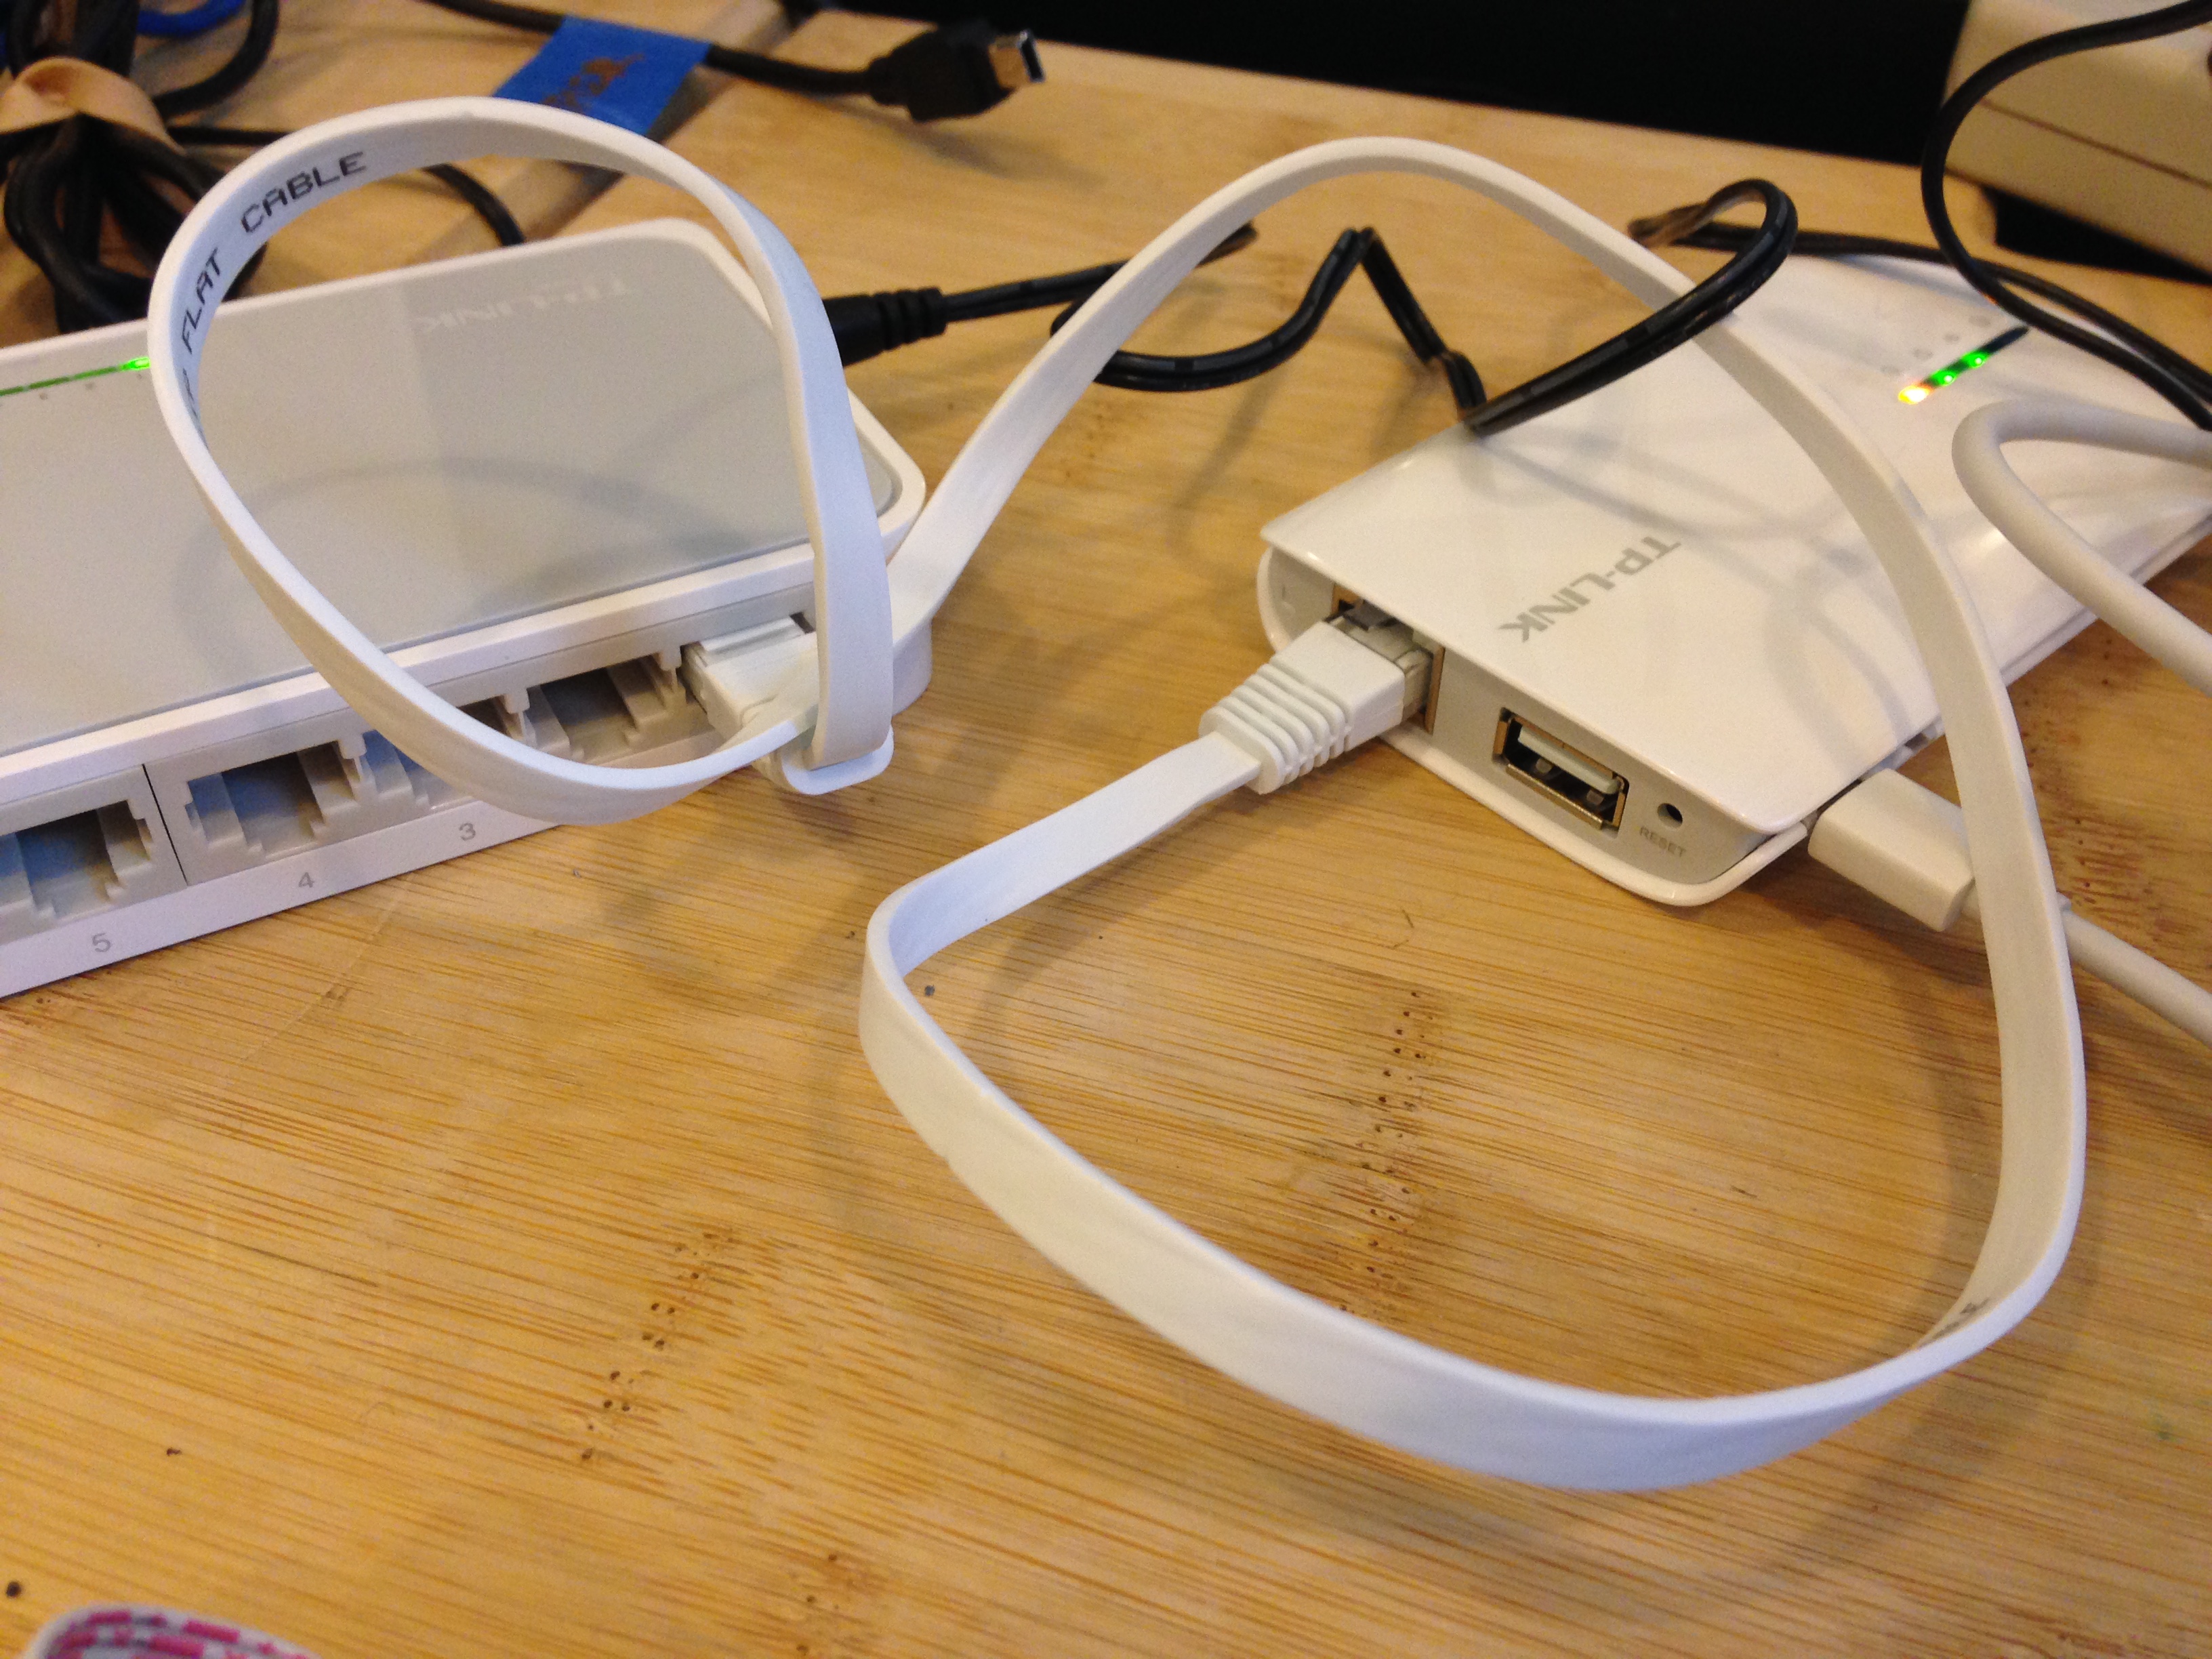
Now hook up the switch to the Wireless router with an ethernet cable in the router package. It should go from the router to the #1 slot in the switch. Oh yeah - the switch. You should plug that in. Pictured is the one I recommend in the Materials list but you can use any switch.
Hook up your Pi’s to the switch (write the number of the switch port on your sticky note if you’d like) and then power. Now you have a wonderful mess.
If you haven’t connected your screens yet, now is a good time to do that to make sure the Pis are booting correctly and everything has power.
SSH Communication
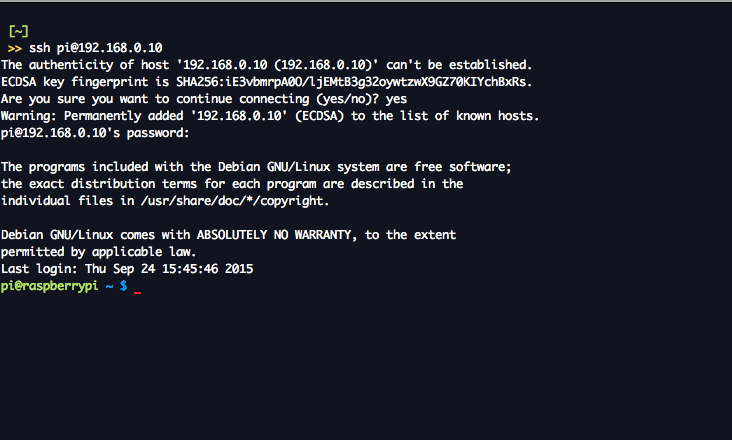
Next we will test the connection to our Pi’s. Make sure your computer is connected to the router’s WiFi network and open a new terminal window for each of your Pi’s. In each window, open an ssh connection by running this command:
ssh pi@192.168.0.XXX
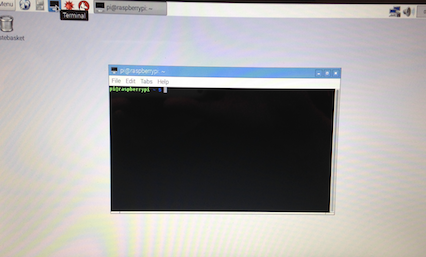
Substitute XXX for the number in that Pi’s IP address. You will be asked if you want to continue. Type yes and hit Enter. Then login as per normal to your Raspberry Pi. If you see something like this - you’re in!
To double check if your Pi’s are actually connected to the internet, run a ping command from each of the Pi’s exactly as it appears here:
ping 8.8.8.8
You should see something like this.
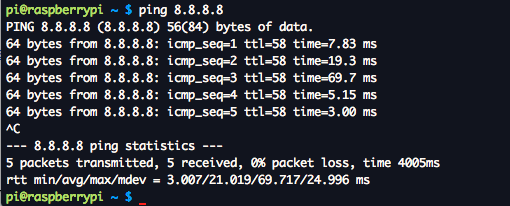
Use ctrl + c to stop the ping. If you don’t have these results or you get an error, make sure your computer is connected to the TP-LINK network. If you’re still having trouble, check all the ethernet connections and if that still doesn’t do the trick, go through the router setup again.
##PiWall Setup
Install tools
Open an ssh connection to your master Pi. We need to install some software tools that PiWall needs in order to run correctly. Run this command once you’ve logged-in to your Pi:
sudo apt-get install libav-tools
Enter your password (it will not show, for security) and hit Enter to download and install the software. It may ask you if you want to install. type Y then hit Enter to accept. When it is complete, it will return you to your normal command prompt.
Download and Install PiWall
For each Pi (including the master), run this command to download PiWall:
wget http://dl.piwall.co.uk/pwlibs1_1.1_armhf.deb
The run this to install it:
sudo dpkg -i /home/pi/pwlibs1_1.1_armhf.deb
Next we need to download a media player for movie playback:
http://dl.piwall.co.uk/pwomxplayer_20130815_armhf.deb
Then run this command to install it:
sudo dpkg -i /home/pi/pwomxplayer_20130815_armhf.deb
More Pi Configuration
PiWall identifies each screen by looking at the hostname of the Pi it is connected to. Right now all of our slave Pi’s have the same hostname, ‘raspberrypi.’ To change the hostname of the slaves, we need to edit 2 files on each Pi.
sudo nano /etc/hostname
In this file, you should just see one word ‘raspberrypi.’ Be brave and delete that and replace it with piXXX, with XXX being the last number in the slave’s IP address. For example, my 1st screen (all the way to the left) is slave #1 and has an IP address of 192.168.0.11, so its hostname is pi11.
Do the same in the hosts file:
sudo nano/etc/hosts
Change ‘raspberrypi’ to the same hostname you typed in the hostname file in the previous step.
Reboot the Pi for changes to take effect:
sudo reboot
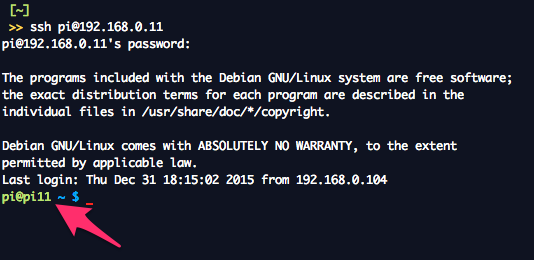
Connect using ssh as per normal, only this time you’ll notice that once you’ve logged in that the name has changed in the command prompt:
Tile Configuration
In PiWall, each screen is considered a tile. We need to configure each tile in the PiWall software so that it gives the correct portion of the video to each screen.
The following steps are taken from the PiWall documentation and can be found here. I will walk you through a slightly simplified version.
Create a file on the master Pi in the home directory (where you are when you first log-in to your Pi).
nano .piwall <- note the ‘.’ placement
In this file we will describe the overall dimensions of our screen grid. The dimensions can be in any measurement scale (in, cm, mm). The program computes their relative ratio. For mine, I used mm.

In the .piwall file, type in your measurements using this format:
[3bez]
width=357
height=62
x=0
y=0

# corresponding tile definitions
[pi11]
wall=3bez
width=112
height=62
x=0
y=0

[pi12]
wall=3bez
width=112
height=62
x=124
y=0

[pi13]
wall=3bez
width=112
height=62
x=246
y=0
Copy this file to every Pi. You can use Filezilla (covered later in “Using FTP”) or just copy/paste to/from your computer and the Pi’s.
On each of the slave Pi’s, create another file in the same place:
nano .pitile
This file is used by PiWall to identify the tile by id. The file should include the following (and will be different for each slave):
[tile]
id=pi11
The id should match the hostname of the Pi. 192.168.0.11 has a hostname of pi11, and an id of pi11.
The .piwall file should appear on every Pi and appear exactly the same. The .pitile files should appear only on the slaves and each one should be different.
Loading a Video File
I have tested PiWall with .avi and .mov files and both work great.
Now it’s time to upload your video file to the master Pi. It will send the video to each of the slaves. Your video file should be the same dimensions as your overall screen grid dimensions, in pixels. You will want to include the space between the screens in this calculation. You can use this page as a reference.
If your video is NOT the same dimension, it will still run but it might appear distorted or cropped.
Using FTP
To load a video file onto the master Pi, we will use FileZilla, which you can download here for free. Connect using the IP address of the master Pi, username, and password (raspberry), and port 22.
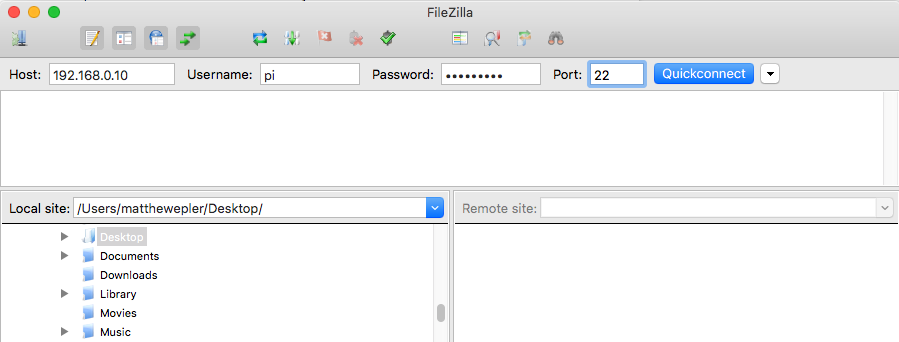
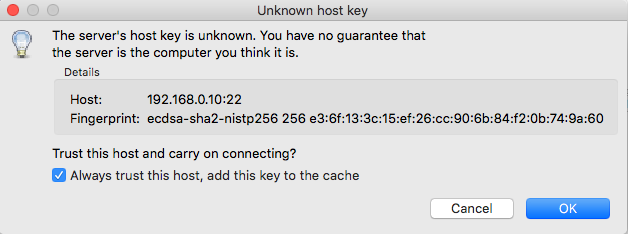
Agree to the popup by checking the box and clicking “OK.”
The left side is your computer. The right side is the Pi. On the left, navigate to the movie file you want to transfer and drag it to the ‘pi’ folder on the right.
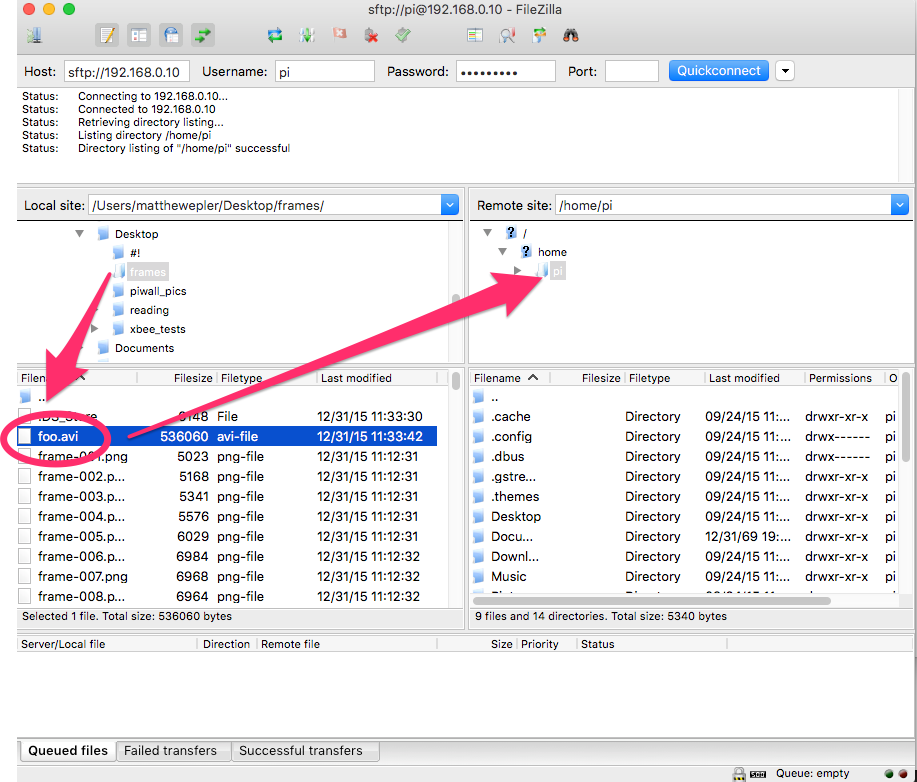
To confirm the transfer was successful, you can click on the ‘pi’ folder on the right and scroll down the file list until you see your file. You can then quit FileZilla.

Playing Video
And now the moment of truth. On the slaves, run this command:
pwomxplayer -A udp://239.0.1.23:1234?buffer_size=1200000B
Nothing will happen but that’s okay. Then, on the master, run the following command but replace ‘movie.avi’ with the filename of your movie. NOTE: if using a .mov file, only change the ‘movie.avi’ section to something like ‘movie.mov.’ Do not change the ‘avi’ after ‘-f.’
avconv -re -i movie.avi -vcodec copy -f avi -an udp://239.0.1.23:1234
This should output some info in the master’s terminal and also trigger some output in the slaves’ terminals. And, if all is good – VOILA! You should now have video.
No video? Unfortunately PiWall does not give you any feedback when something isn’t working right. Your best bet is to visit the PiWall forums.
In my case, I didn’t see video at first and realized much later that my video file was corrupted. I tested my setup with a downloaded video I knew was good and verified everything was working. Then I went back and re-exported my video and everything was good.
Conclusion
I hope this has been helpful. It’s a little bit messy and there are lots of things that can go wrong with PiWall. Unfortunately, I had to dismantle my video wall so if you send me questions I probably won’t be able to answer them. Your best bet is still the forums. Good luck!