Creating a Sound Installation with Adafruit's Sound FX Board
Summary
This tutorial will show you how to set up a multi-channel sound installation using Adafruit’s Sound FX board + amp. This setup was used at NASA’s Space Apps event in NYC in April, 2016.
In the following sections, we will cover:
- downloading video from the internet
- extracting audio from video using ffmpeg
- optimizing audio in Audacity
- setting-up the Audio FX board and amp
- design & fabrication of display hardware
- installation
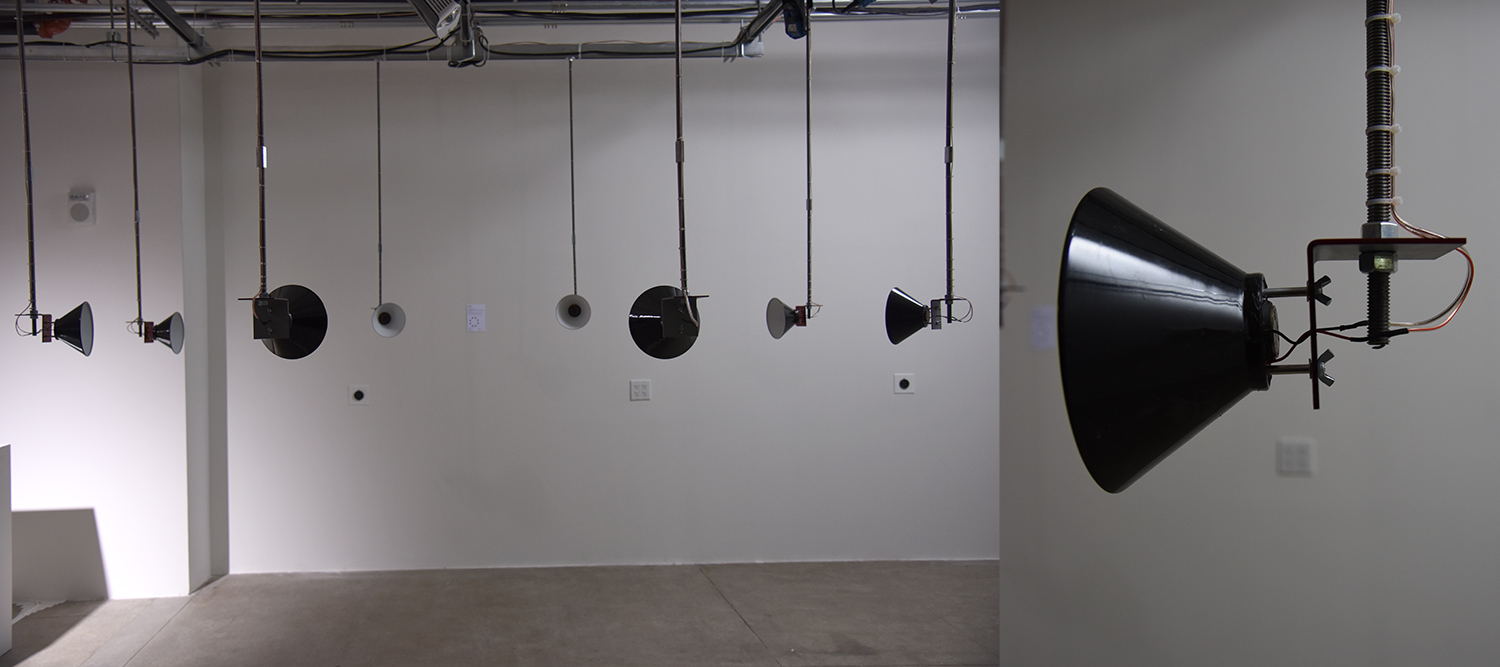
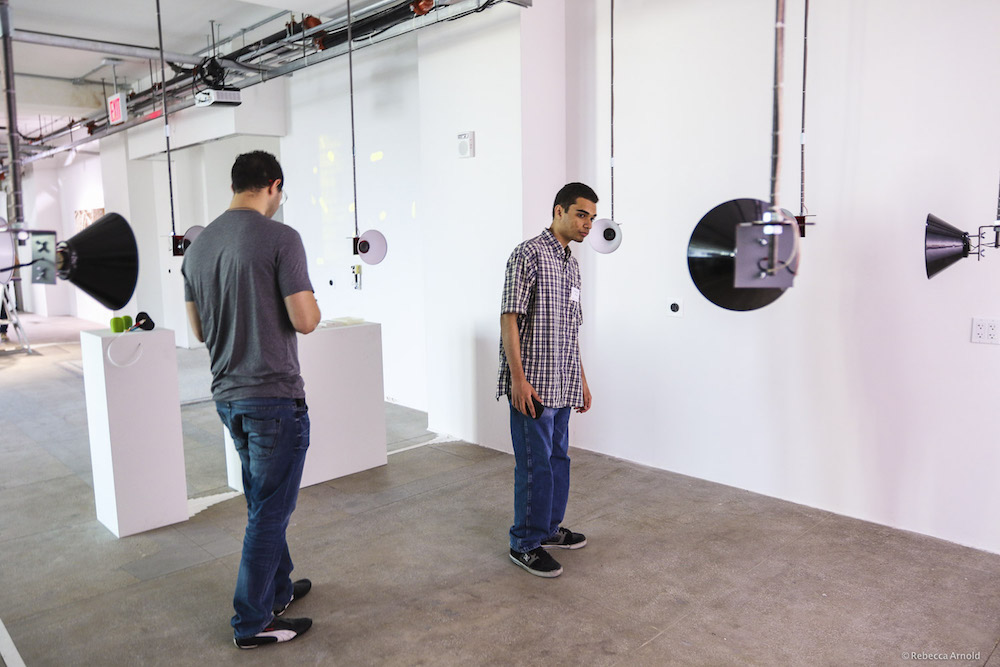
The finished product is 8 suspended listening cones that all face a common center. Users can either stand in the middle and hear all of the sounds mix together, or walk up to individual cones to hear a specific sound. The overall volume is low, and is meant to encourage close listening. For more volume, use a bigger amp (like 2x these amps).
Design files can be found here: spacesounds github repo
You might be wondering - why not just buy 8 generic mp3 players? I could have, but this setup gives me more flexibility for future projects and is about the same cost per unit. But mp3 players would also work - you’d would still have to use the amplifier circuit, though.
Requirements + Materials List
- Basic soldering skills and supplies
- laser cutter or milling machine (if using acrylic - may not be necessary if using other materials like wood, foam board, etc.)
- 5V power supply (a phone charger will work)
- 4x large breadboard
- 8x Adafruit AudioFX Board (2Mb or 16Mb - either will work for this project)*
- 8x Mono amplifier (Adafruit)
- 8x 8 ohm speakers (Amazon or Adafruit)
- 4x breadboard tactile button switch (momentary)
- 4x dual screw terminals
- hookup wire
- proto PCB board (not absolutely necessary)
- foam core, gator board, or piece of wood to mount everything to
- 16x male/female standoffs (~ 1 inch), screws (~ 1 inch), washers, wingnuts 6-32 or 8-32 is fine.
- speaker wire
- epoxy
* if not available on Adafruit, you can find these on Amazon and through third-party vendors online.
Extracting Audio From Online Videos
The sound used in this installation comes from this blog post listing NASA sounds posted on YouTube.
There are a variety of approaches to extracting audio from online videos. If you have another way of doing this, feel free to do it your way. This is just the one I happen to use for this project.
To extract sound, you must first download the video file. You can do this using a command line tool called ‘youtube-dl.’ It’s written in Python and is easy to install and use. Go to the youtube-dl home page and download, install.
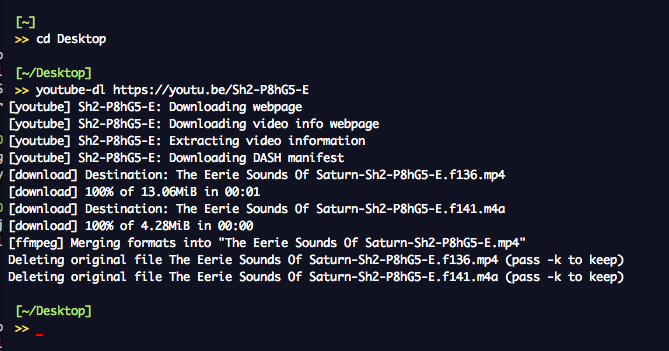
Once installed, go to your Terminal program and navigate to the folder you’d like to work from. In my case, I’m using my Desktop. Type youtube-dl and a space after. Then paste in the URL of the video you are trying to download. Here’s an example for the first video that appears on the blog site (Saturn’s Rings):
Now you should have a movie file in your working directory. It might be an mp4, mkv, mov, or some other format. All of those are fine, because ffmpeg works with just about any kind of video file format.
You haven’t already, install ffmpeg by going to their download page to download the install package, then install it.
Then in the work folder, where the movie file you just downloaded is located, run the following command, replacing “saturn_rings” with your filenames. The first filename is the movie file, the second is the name you’d like to give the resulting audio file. The first file should end with the suffix of whatever kind of file you downloaded (mp4, mkv, etc). The second file should be ‘.wav’.
ffmpeg -i saturn_rings.mp4 -vn -ac 1 saturn_rings.wav
This command means: * ffmpeg: use the ffmpeg application * -i: option to set input filename * saturn_rings.mp4: imnput filename * -vn: disable video output * -ac: option to set number of audio channels for output * 1: number of channels for output * saturn_rings.wav: output filename and type
We only need one channel because our setup uses only one speaker for every file. The end of the output in your Terminal should look something like this:

Repeat these steps for each audio track you plan on using, then proceed to the next section. You should have 8 .wav files. You can delete the video files if you want.
Optimizing Audio in Audacity
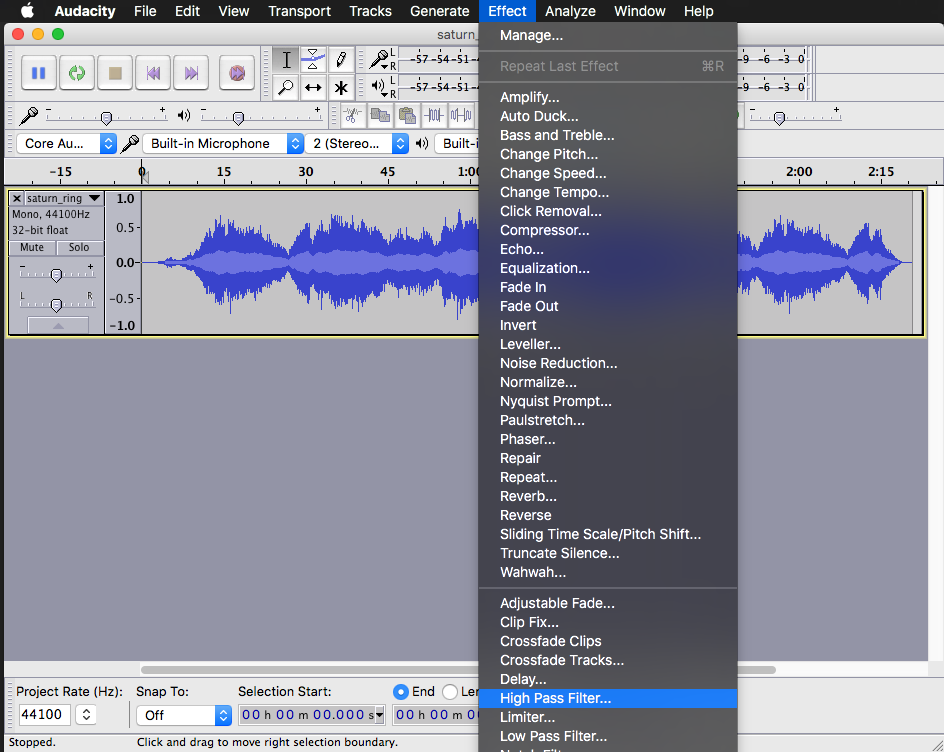
Audacity is a free sound editing software you can download here. Open one of the .wav files you preparred in the previous step in Audacity and use the playback controls in ther upper-left to listen to the track to make sure it’s what you want. If you get a pop-up warning about selecting an import method, select “Read the files directly from the original.”
We need to optimize the audio for our small speakers. The space sounds have a lot of lower frequencies that make the speakers rattle and vibrate. To get rid of this, we’re going to apply a filter. From the “Effect” menu, select “High Pass Filter.”
After doing a few tests, I found the best settings for my setup were:
- Rolloff = 6dB
- Cutoff frequency (Hz) = 1500.0
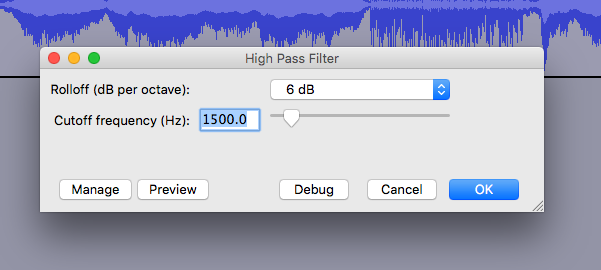
Click OK.
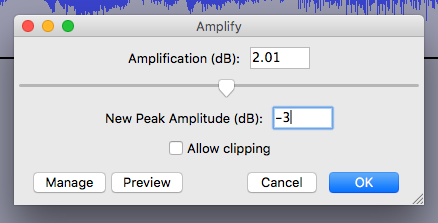
Now we need to adjust the volume so that the speakers don’t peak and distort the sound. I found through trial and error that -3dB is a safe peak level. To apply this, go back to the “Effects” menu and select “Amplify…” In the “New Peak Amplitude (dB)” box, enter ‘-3’ then click OK.
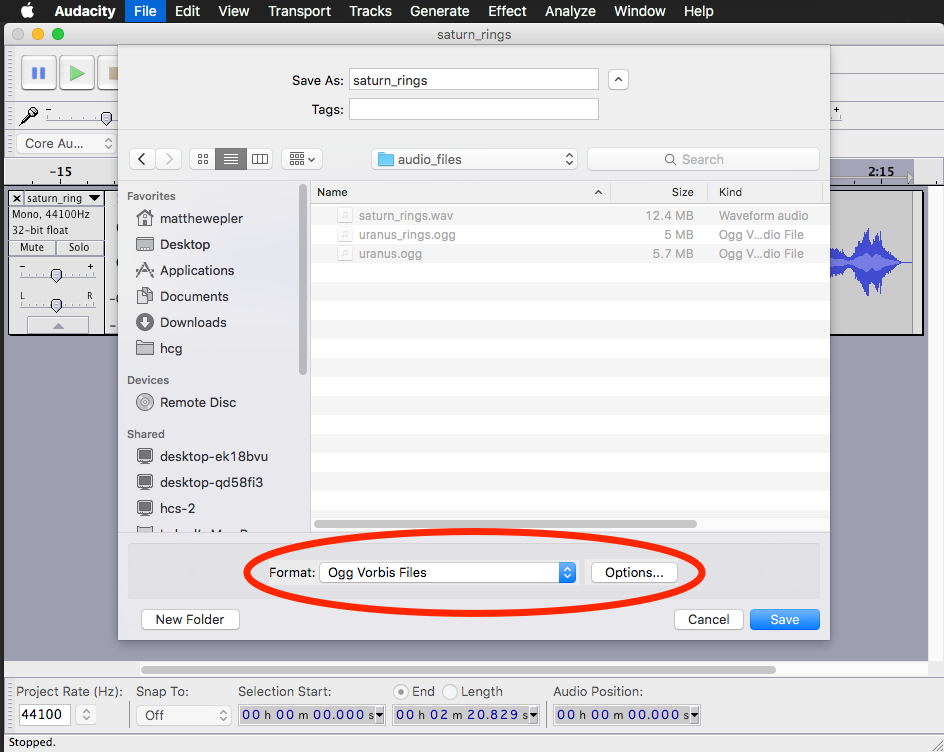
Finally, we want to export the file to the .OGG file type. This is a lossless compressed file type for audio that will reduce our filesize without reducing the quality of our audio.
Go to the “File” menu at the top of the screen and select “Export Audio…” Name the file (or keep it the same, which I recommend) and select the “Ogg Vorbis Files” option in the Format drop-down menu.
Then click Save. Click OK through the next pop-up and wait while the audio exports.
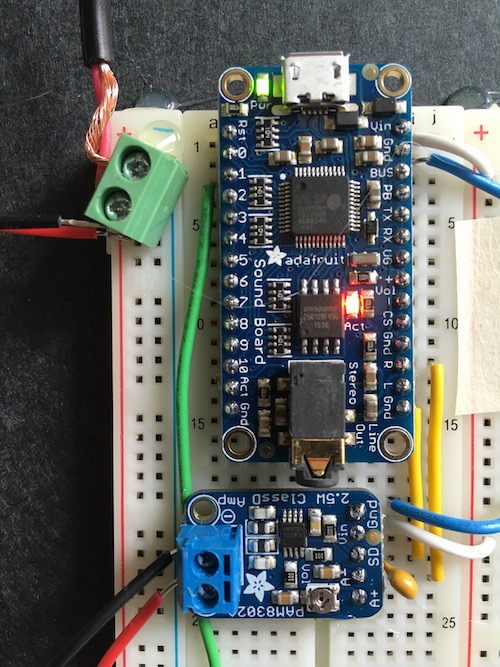
Setting up the AudioFX board and amplifier
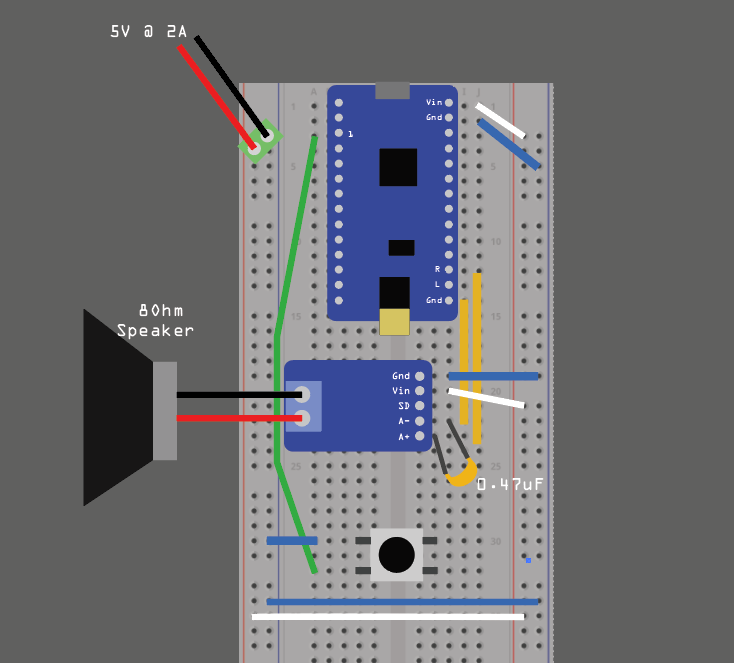
Solder the headers onto both boards. Insert them into the breadboard. Then make the connections as shown in the diagram below.
!! DO NOT CONNECT THE BREADBOARD TO POWER YET !!
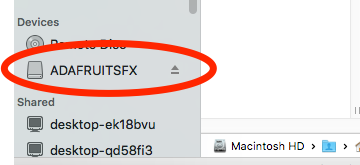
Now connect the board via USB to your computer and you should see it pop up as a drive in your Finder’s “Devices” menu.
In the drive you’ll see a test file that was put there when Adafruit was testing the board before delivery. You can delete this file, but make sure you empty your trash too. There are some comments in the Adafruit forums that suggest not doing this can cause problems.
Then drag the .ogg file you exported from Audacity onto the Adafruit drive.
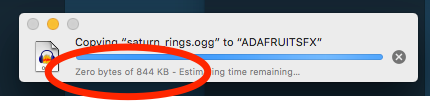
NOTE: on my computer, this took waaaaay longer than it normally does to transfer a file AND the progress bar never moved beyond “Zero bytes.” Just wait and it will eventually be done and the progress bar will just disappear by itself. You should see the file on the drive then. In my case, it took anywhere between 2-5 minutes.
For a more in-depth introduction to the board, see this tutorial on Adafruit’s site.
Next, you need to rename the file to: T01LATCH.ogg
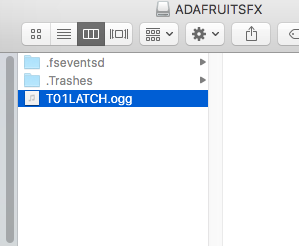
This tells the board how to handle your file. It is telling it that this file is triggered by pin #1 on the board, and that when it’s triggered, it should play in a latching (continuous) loop. There are other playback options, which can be found on Adafruit’s page here.
Eject the drive and disconnect the board from the USB cable.
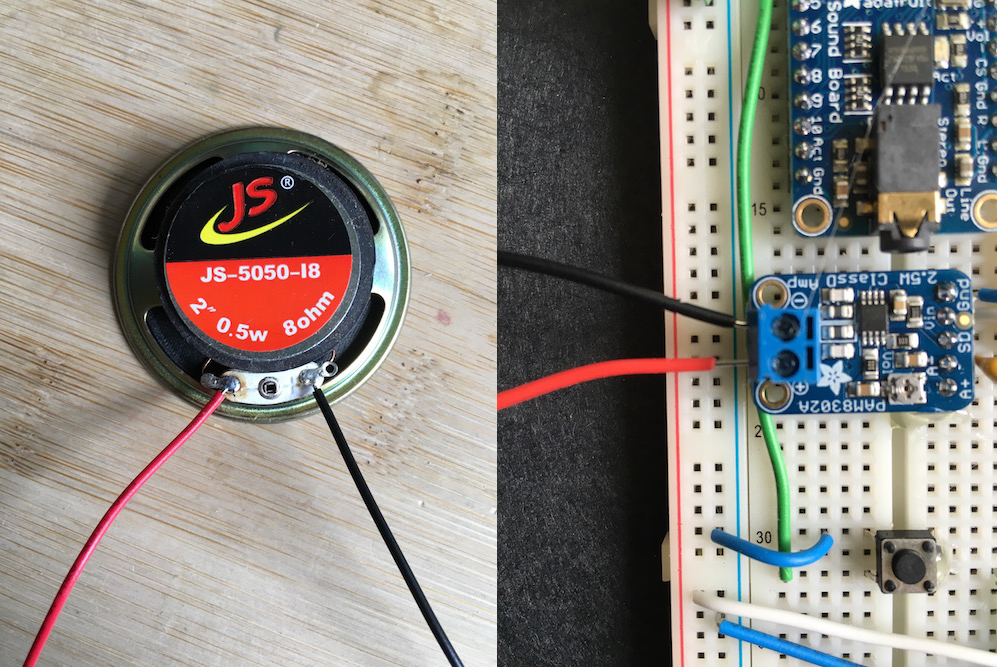
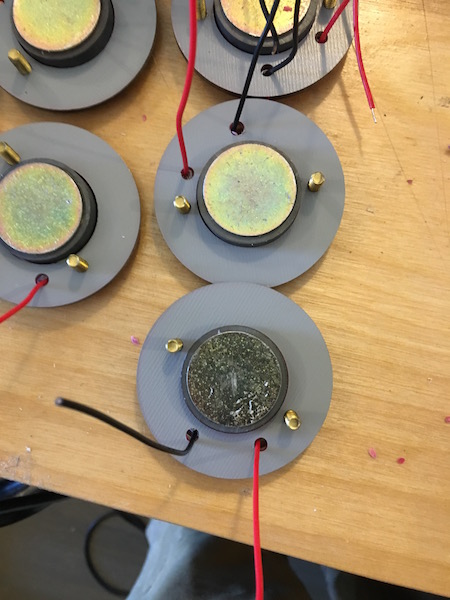
Next, we need to connect the speaker to the amplifier circuit. On your speaker, you should see two clearly labeled terminals. Solder ~6 inches of hookup wire to each of these and connect them to the corresponding slot on the amplifier’s screw terminals. Tighten the terminals firmly.
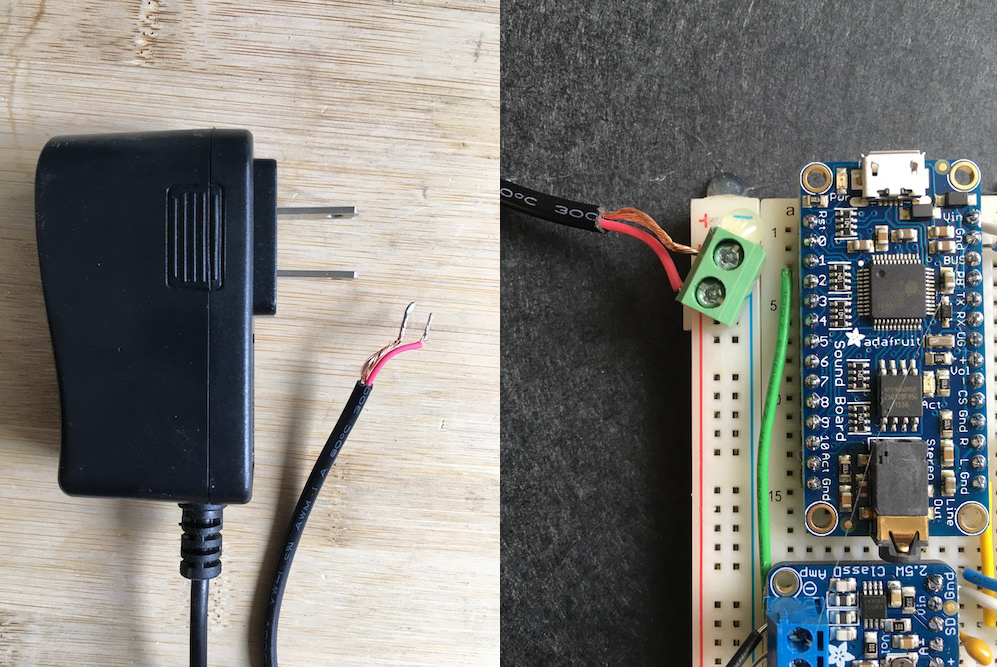
If you are using a wall-wart style power supply, you will want to cut and splice the wire. If you’re not sure which is power and which is negative, plug it into the wall after splicing and use a multimeter to look for positive voltage across the two wires.
I recommend putting a little solder on the tips to keep them from fraying. Then insert them into the terminal on the breadboard and tighten.
Turn on the power and you should see a green light on the Sound FX board. Now press the button once. A red light should come on the board and you should hear sound out of your speaker.
If your having problems, check the wiring of your breadboard. Test for voltage and common ground. Then check out Adafruit’s troubleshooting guide for the board.
Great! Now only 7 more to go….
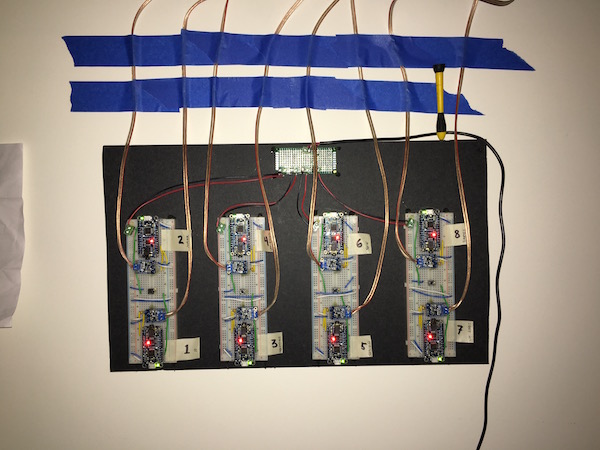
I’ve mirrored the setup on each breadboard, with each breadboard sharing a single button. A press of the button triggers both boards, and there is one power connection for both. I’ve also labeled the boards so I know what track is on them.
Lastly, I ran all the power to a central PCB where I connect the power supply.
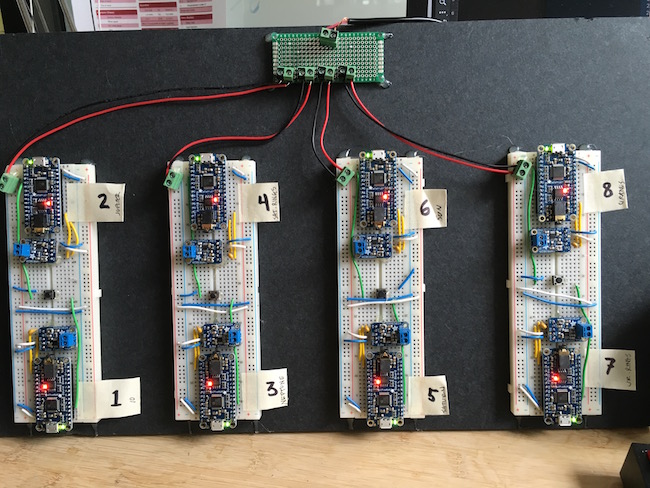
AT this point I also put hot glue on everything to make sure it didn’t move. That included the breadboards, power terminals, proto PCB, amplifier, button, and any wires that looked loose. Hot glue is powerful magic.
Design & Fabrication of Display Hardware
We had 2 days to throw this together, so there’s a lot of improvisation in the following steps. I look forward to seeing what other people do for the physical display of similar projects. Basically you have all you need now and we just need a way to hold the speakers and a place to put the electronics.
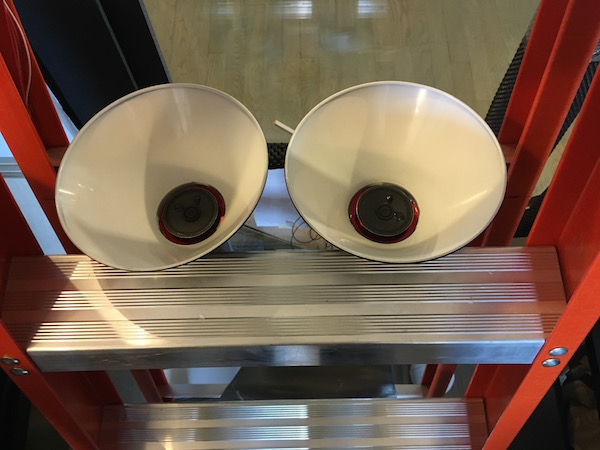
In our case, we wanted to keep things simple yet elegant. We decided to use 1/8” mirrored red acrylic to build a bracket and mount the speaker inside a “listening cone.” Each cone and bracket assembly was suspended by a threaded rod from the ceiling.
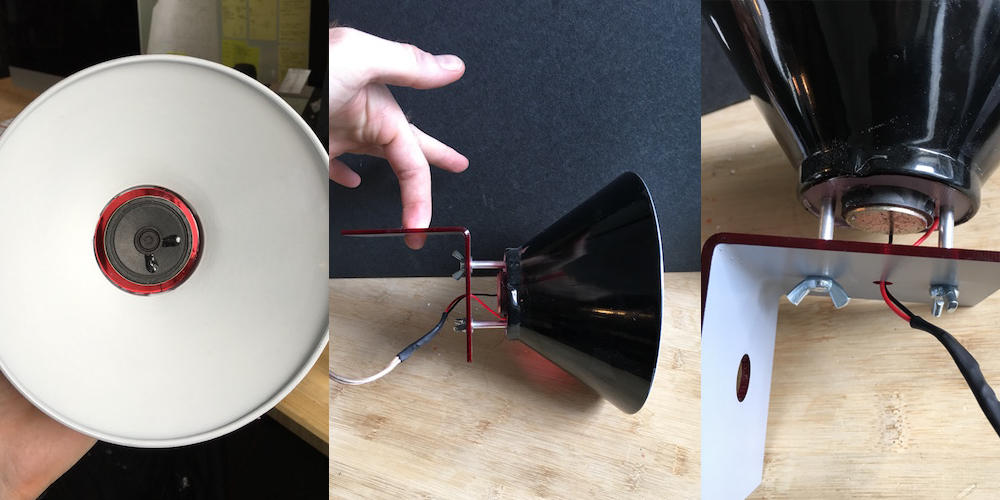
My speakers were from the Amazon link above in the Materials list. The cones are lamp shades from office desk lamps, which I “borrowed” from my co-workers.
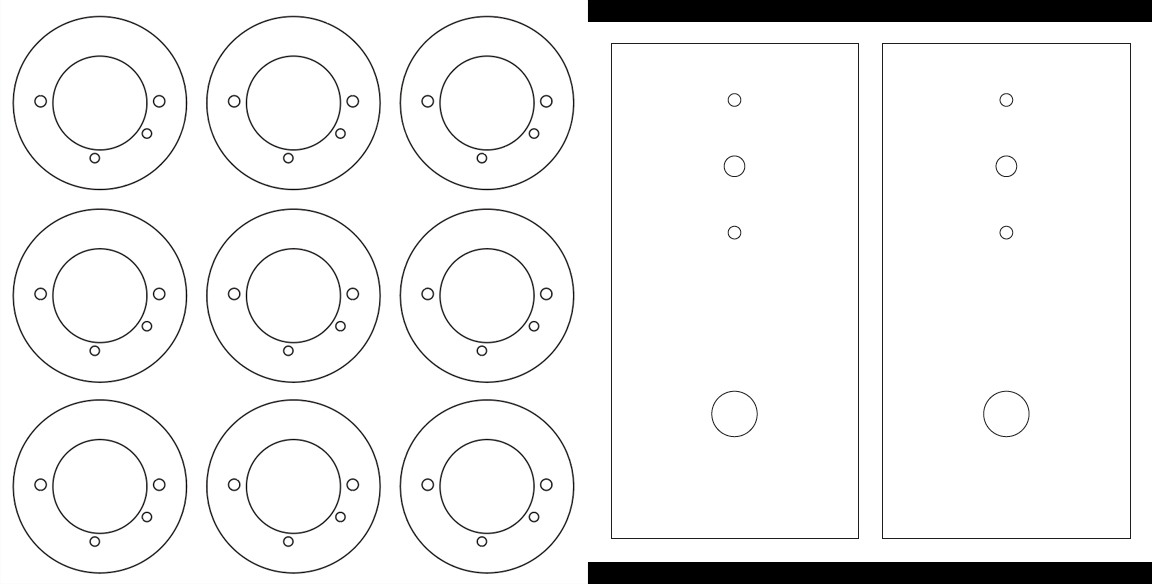
The bracket and mounting plate for the speaker can be made from acrylic using a laser cutter or milling machine (CNC). If you do not have access to these materials, you can print out these files and cut them out however you wish. You can download either the AI or PDF fromt the repo.
To bend the acrylic, I used our heat gun, a vice, and flat-jaw locking pliers. Apply a small amount of force in the direction of the bend while heating the acrylic along a straight line. When it is pliable enough, you’ll feel it give and you can remove the heat gun to bend the acrylic. Hold it in place for about 20 seconds to cool, then remove from the vice.
NOTE: the picture below features a piece of scrap acrylic, not the one used in the construction of the final piece.

With the hookup wire still attached, slip the speaker through the bracket. Apply epoxy around the seal, or generously in 3-4 spots around the magnet. When the epoxy is set, thread the screws through the holes that are in a straight line across the diameter of the bracket.
Then set the bracket and speaker into the cone and epoxy from the back. Then flip it over and find a resting place where it can hang and set (like a slightly open ladder, or two boxes close to each other).
While all of those are drying, you can hang your threaded rod, and run speaker cable to each one with enough extra to account for any miscalculation that is destined to occur. Run the speaker wire back to the breadboards and screw them into the amplifier terminals. You’ll have a beautiful wall of spaghetti when you’re done.
I used some washers and nuts to secure the 90-degree bracket to the rod first, then mounted the cone assembly with the standoffs, washers, and wingnuts. Then tested the system, and all was well with the world.
Best part about this is that it’s reusable and doesn’t require any coding! Hope this helped.
M